Page 6 of 11
Re: My turquoise eleven window bus
Posted: Thu May 09, 2013 1:22 pm
by joshroom
Cheers Steff, I can't remember the brand names of the stuff I've been using, next time I'm at the shed I'll get some pics.
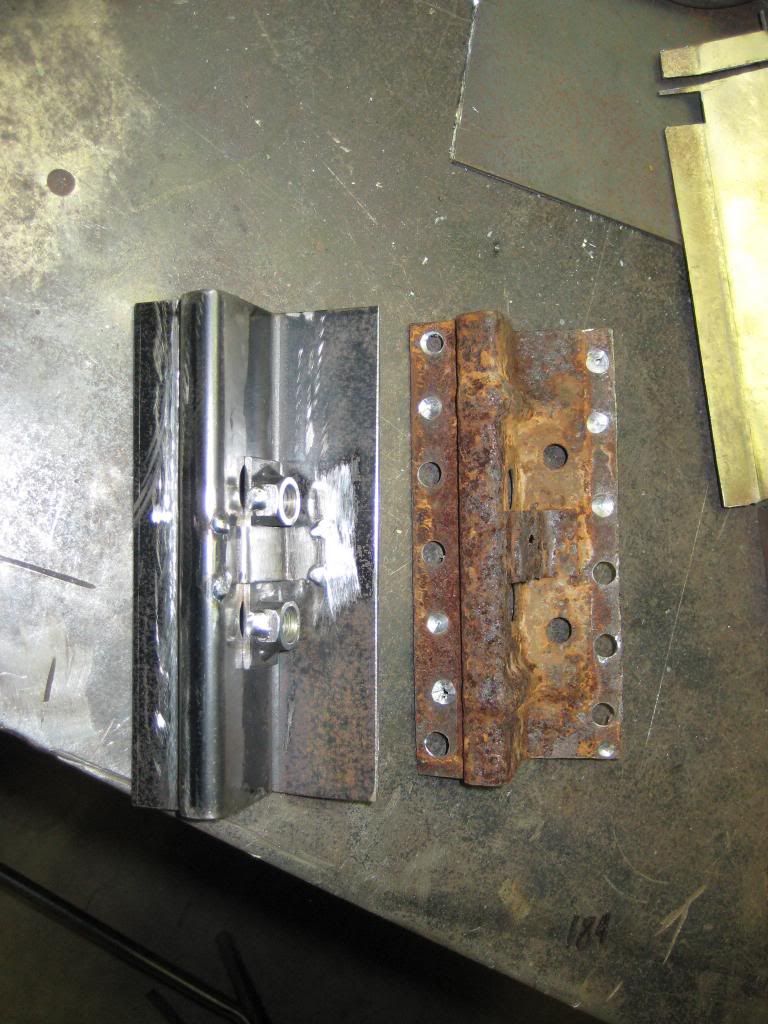
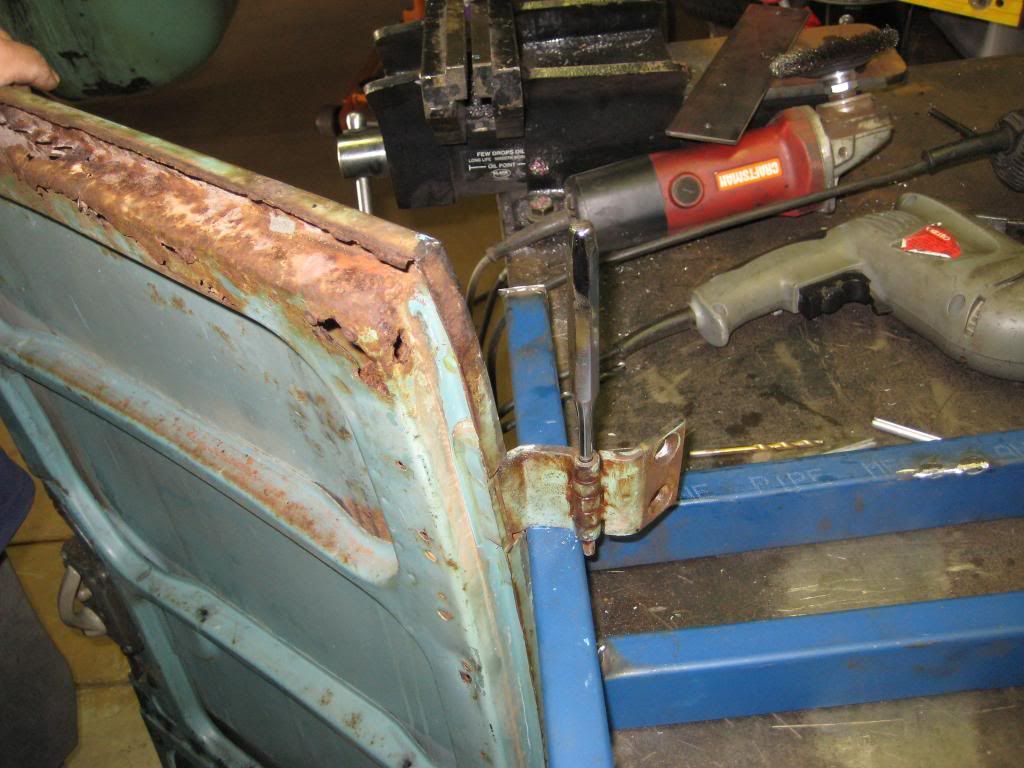
started hookin into this ugly bog monster. I checked the cargo door hinges out for about an hour, measuring and comparing them to the other door to see if I could find find anything bent. but everything measured up good, aside from a little slop in the lower hinge (not enough to be causing the tight gap). so I checked the hinge carrier and I think I've found the problem.
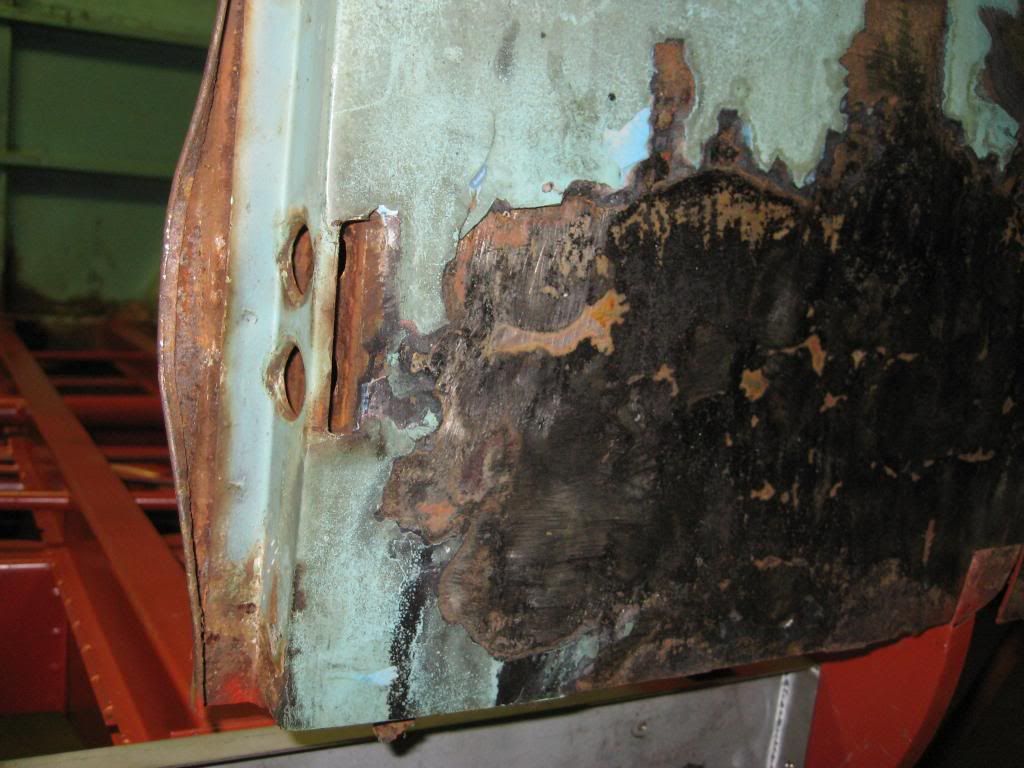
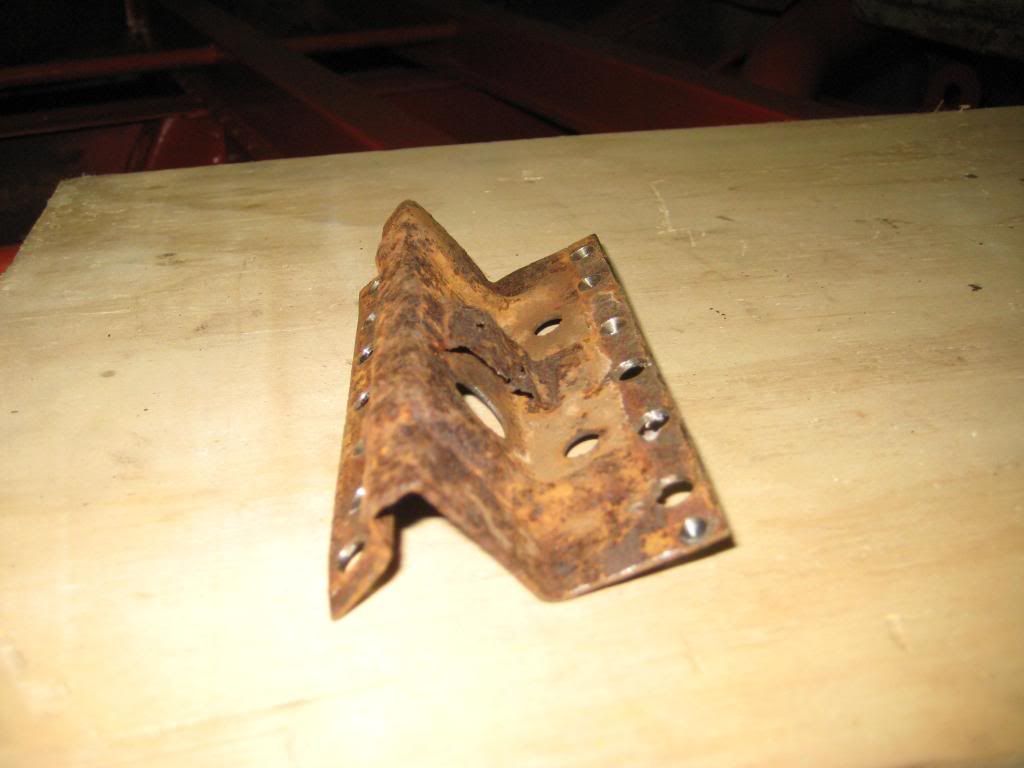
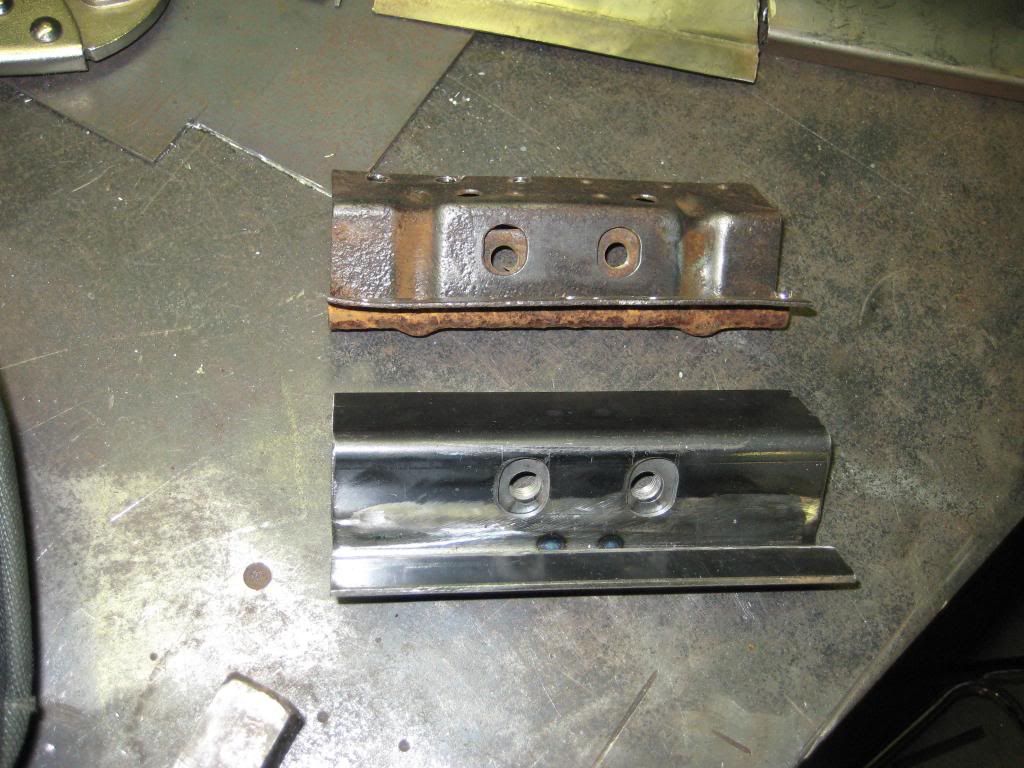
So I drilled out the hinge carrier to inspect it. Pretty invasive but the thread retaining plate had rusted through and the whole thing looked pretty rooted. I took some photos of it and I can only assume it should look a lot straighter. Anyone know if it should look like this or all the bends should be pretty much at 90 degrees/right angles? Any help/advice appreciated as I'm probly out of my depth.
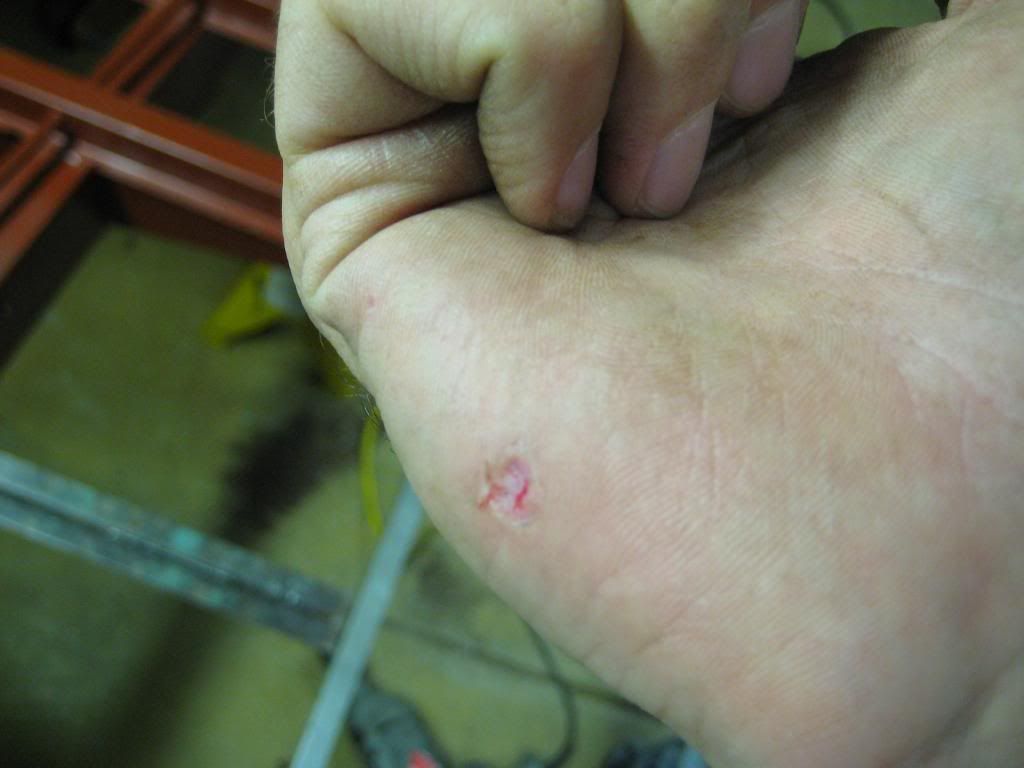
TIP/Note to self: don't leave your wank spanner behind where your drilling.
Re: My turquoise eleven window bus
Posted: Thu May 09, 2013 7:55 pm
by Leroy
Ha ha ha...wank spanner

Top work as always Josh. Loving this thread

Re: My turquoise eleven window bus
Posted: Sat May 18, 2013 11:22 pm
by joshroom
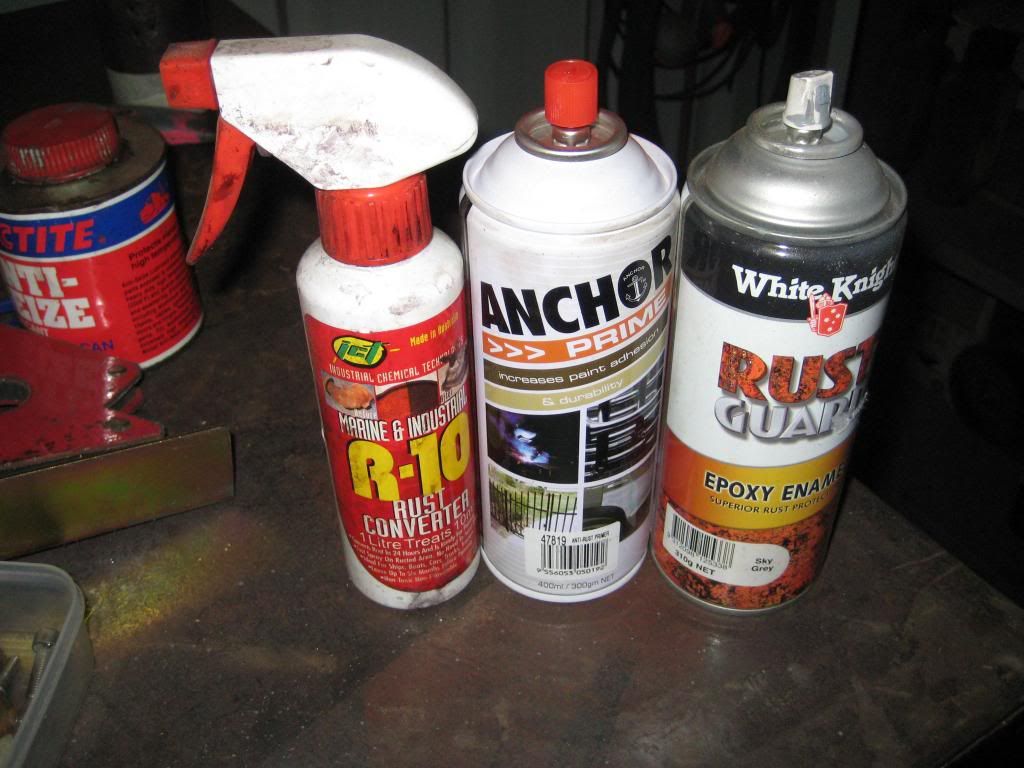
This is the stuff I've been using Steff, R-10 rust convertor, White Knight rustgaurd epoxy enamel, Anchor anti-rust primer.
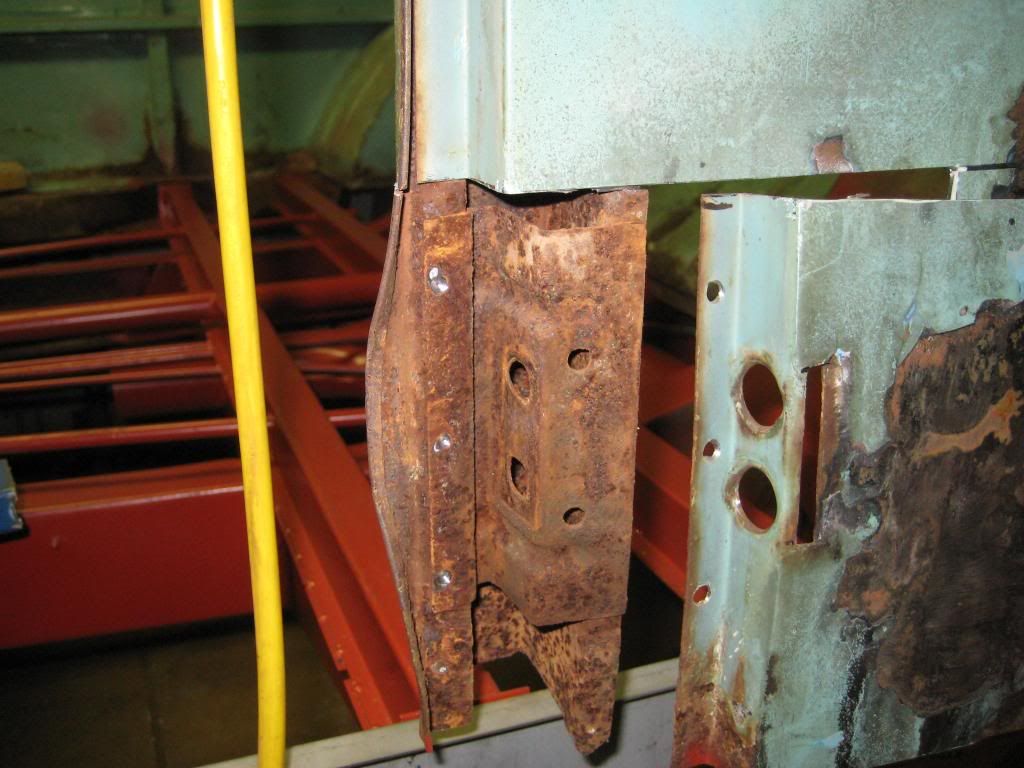
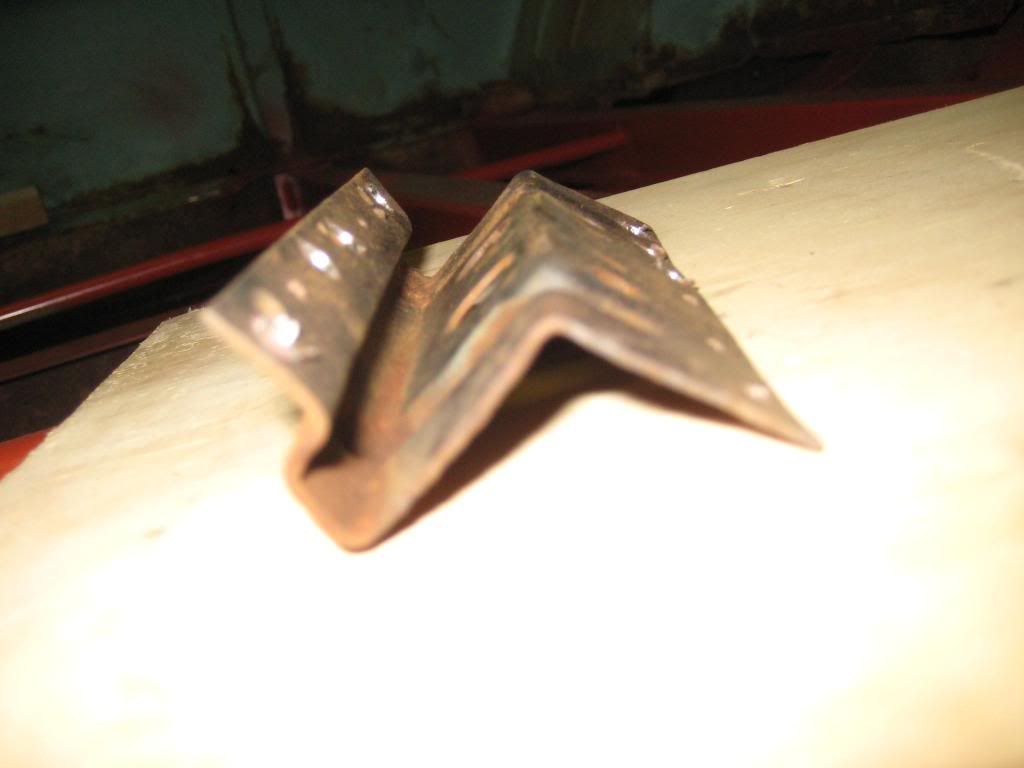
So I made up a new hinge carrier bracket and bent up some sections to make a new "C" pillar and mocked it all up to see how it looks
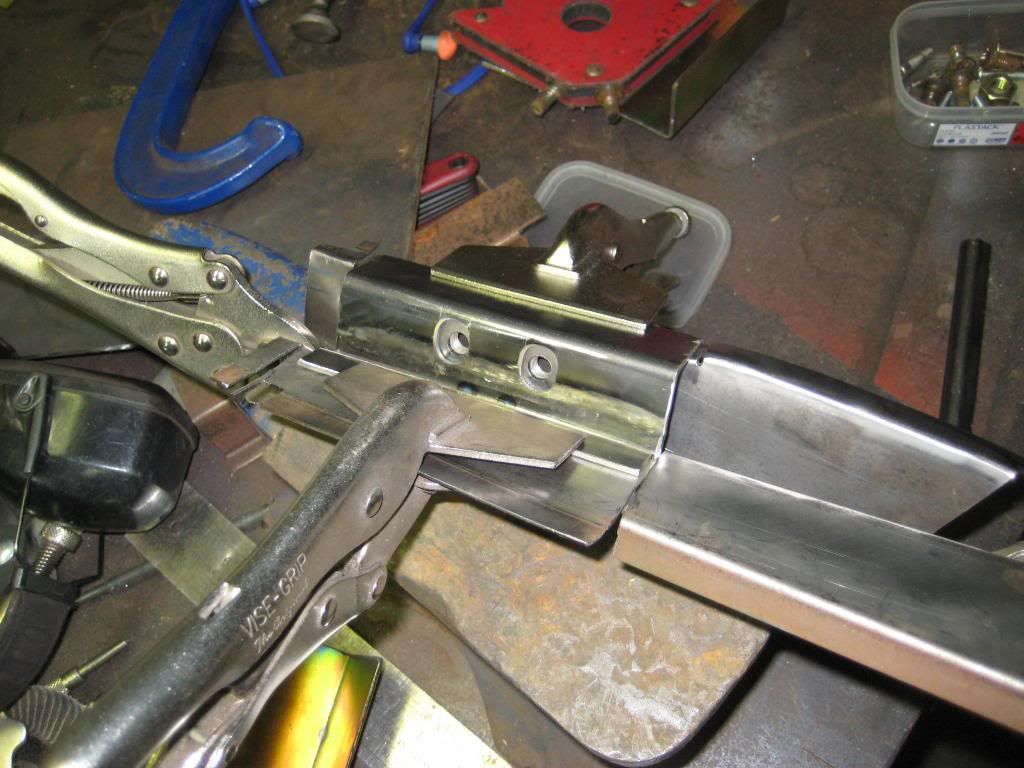
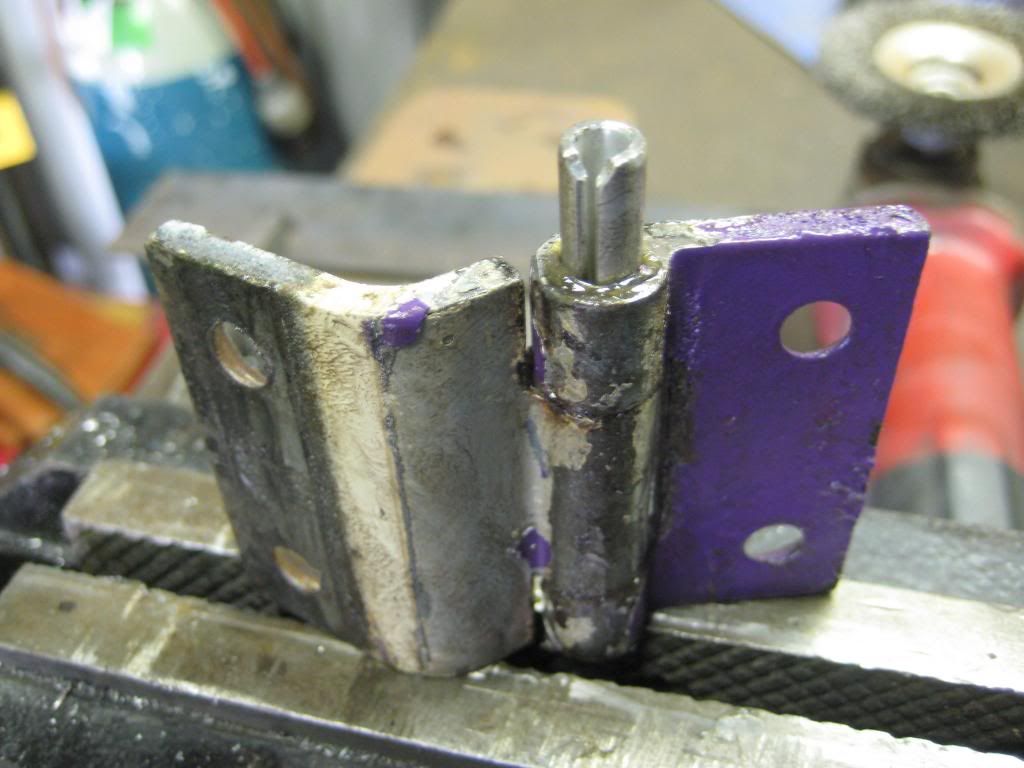
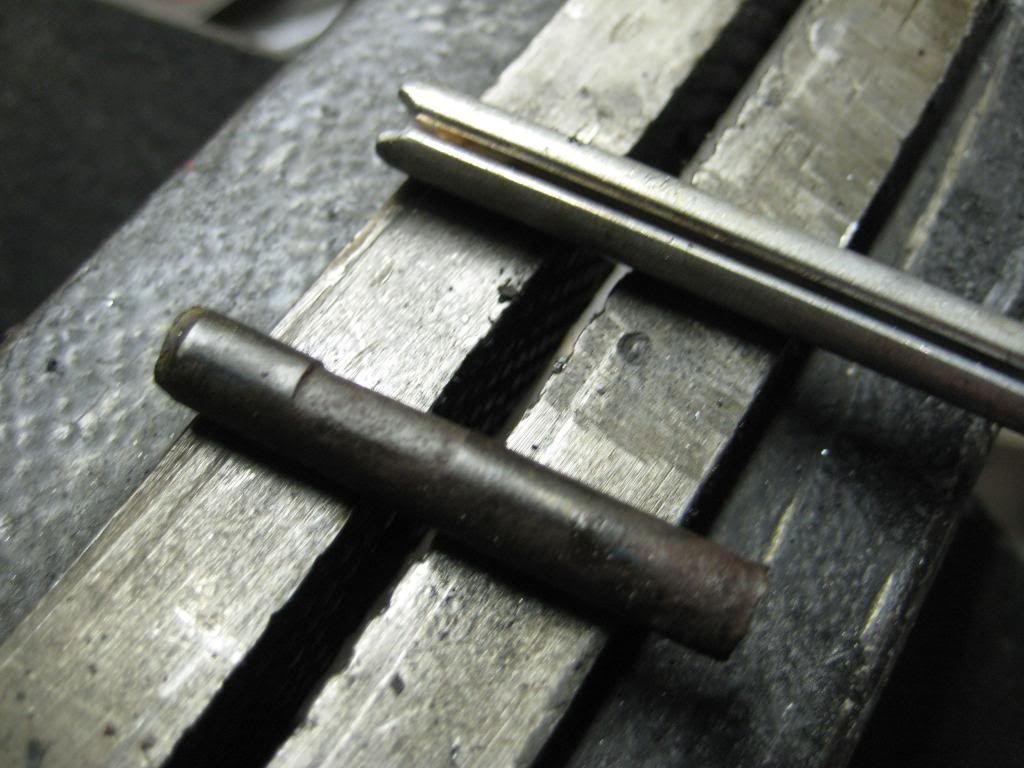
But before I got too carried away I wanted to have a go at re-pinning the lower hinge on the rear cargo door. It had a lot of slop in it, probably due to the door gap binding up when closed. So after lots of searching for info on how to re-pin them, and finding sweet fuck all, I decided just to practice on a spare engine lid hinge I bought off a fellow dsk member (you may recognise the colour

). I tried using a centre punch to knock out the old one but it would not budge. So I drilled out the old pin with a 5mm drill bit, and and graduated up to a 6.5mm drill bit which is slightly oversize to suit the new roll pins I bought (6.71mm)
Tapping in the new pin was a nice firm fit, used plenty of grease. All the play is completely gone but the hinge was a little stiff. So I plan on knocking the new pin back out and lightly filing out the section on the left so it moves a bit more freely.
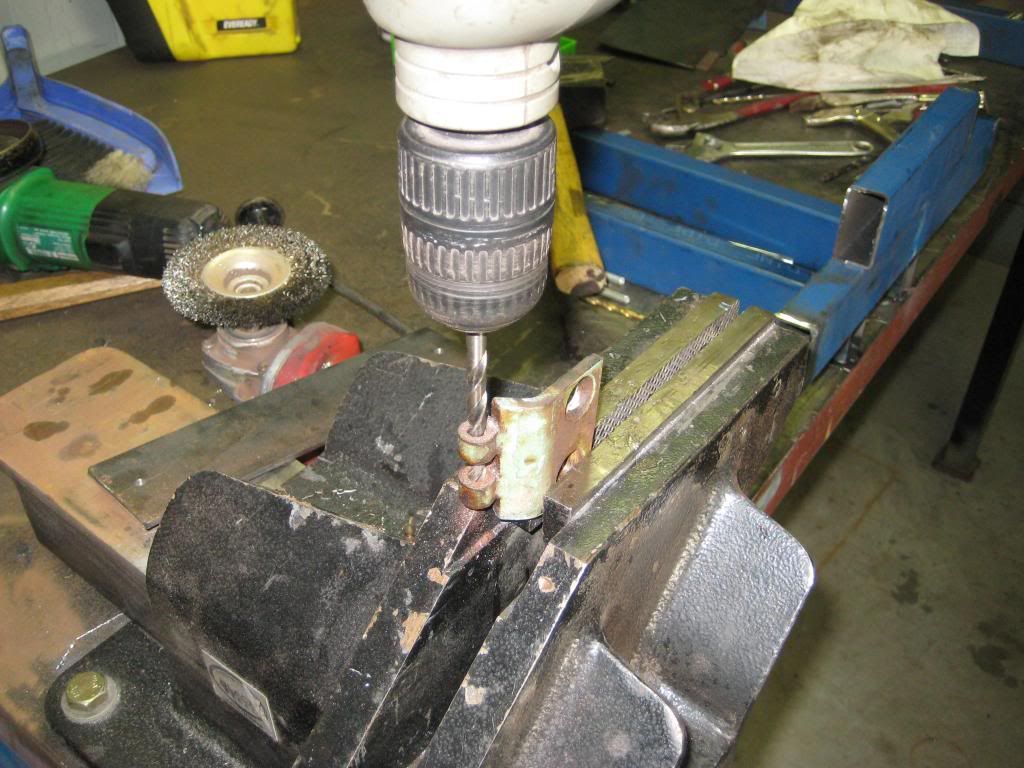
So I did the same for the cargo door hinge except after a bit of drilling I was able to knock most of the old pin out. Welded some scrap to the bench so I could sit the hinge up and have the door off the ground while I knocked the pin through.
You can see the worn sections on the pin and the hinge halves also slightly out of round
Drilling the hinge sections out with 6.5mm drill bit, I gave this side of the hinge a very light file with a round file, so it is slightly bigger than the other so the hinge won't be to too stiff.
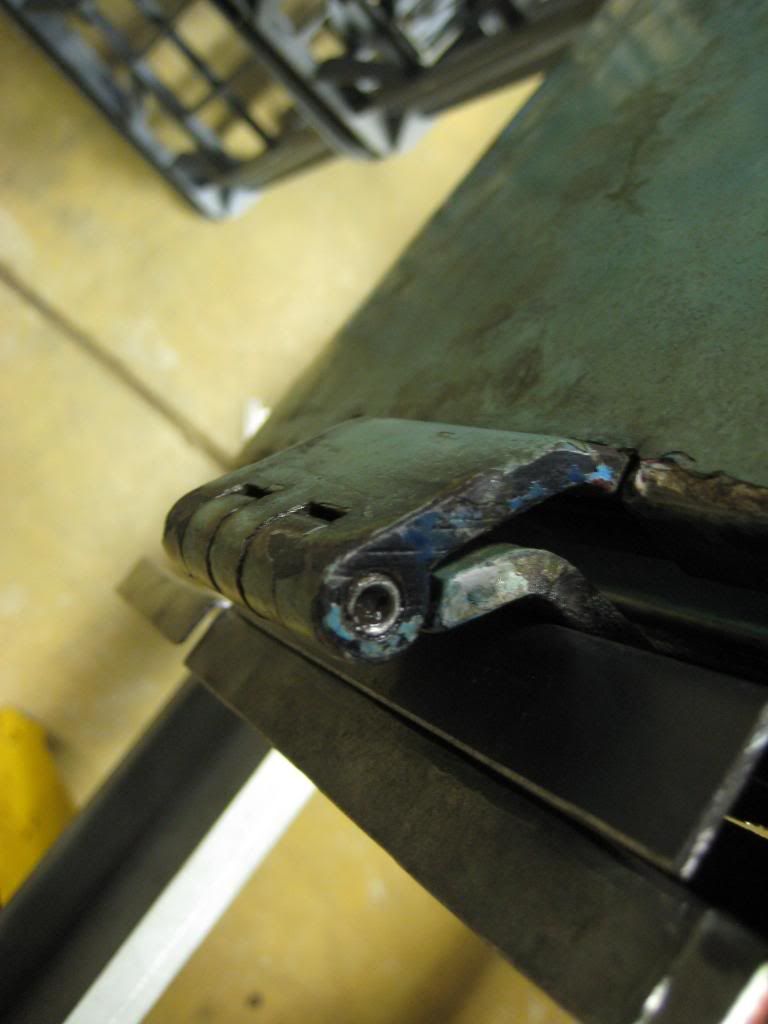
Knocked in the new pin, no play and not stiff just perfect! I'm stoked, gonna do the two others that need doing.
Re: My turquoise eleven window bus
Posted: Sat May 18, 2013 11:43 pm
by joshroom
Also did the last bit of welding on the narrowed beam I built for the bus.
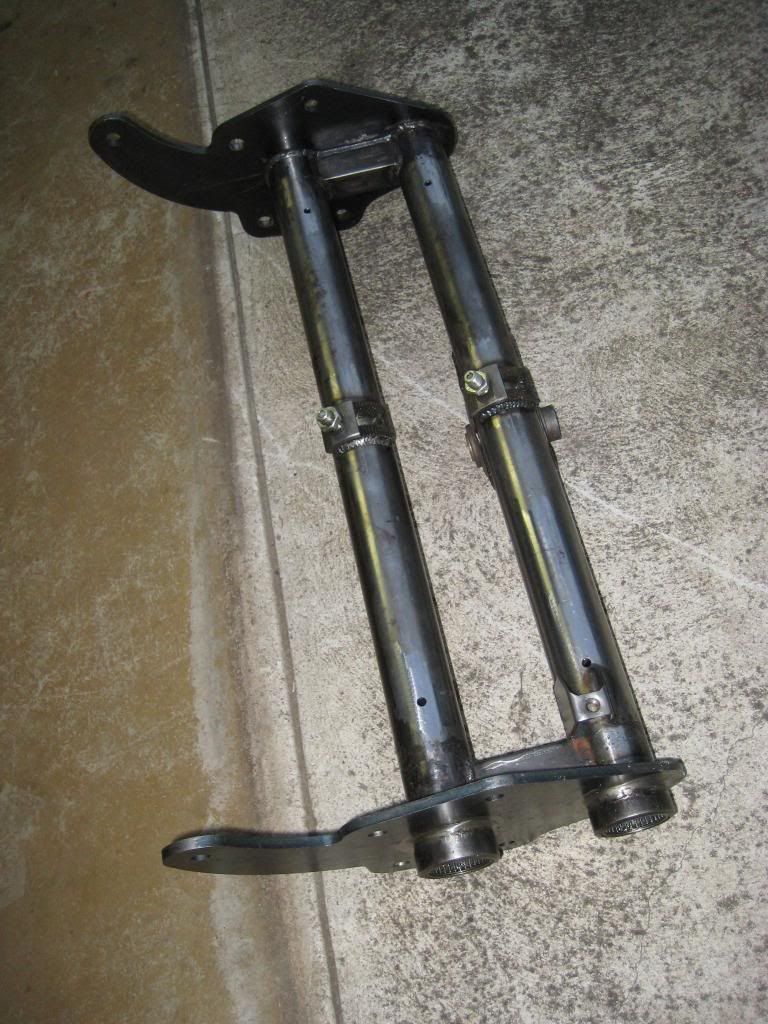
Might be ready for some paint I reckon.

Re: My turquoise eleven window bus
Posted: Sun May 19, 2013 12:09 am
by Greypow
Good work on the hinge - well thought out and executed. Where did you source the roll pins from Josh
Re: My turquoise eleven window bus
Posted: Sun May 19, 2013 2:15 am
by mat54
Nice looking beam good looking work!
Re: My turquoise eleven window bus
Posted: Sun May 19, 2013 8:39 am
by joshroom
Thanks guys, I'll have to ask my dad where he got the pins from Graham, I think it was a lawnmower repair shop (he's a greenskeeper).
Re: My turquoise eleven window bus
Posted: Sun May 19, 2013 9:56 am
by mat54
Very common
Get them at any coventrys
Supercheap had an array in a box once of different sizes
Maybe even repco as well.
Cheers
Steffen
Re: My turquoise eleven window bus
Posted: Sun May 19, 2013 12:42 pm
by mozzie
fuck nice work mate quality as always. I'm glad your moving along nicely on this bus and concentrating on your own project.
Re: My turquoise eleven window bus
Posted: Sun May 19, 2013 6:11 pm
by kombi niko
Nice work on the beam too!! You cut the side plates out your self?
Re: My turquoise eleven window bus
Posted: Sun May 19, 2013 6:34 pm
by Ian 68
As always mate I admire your skills. Keep at it, it won't be long now.
Best
Ian
Re: My turquoise eleven window bus
Posted: Tue May 21, 2013 8:36 pm
by deadkombi
Too good to paint Josh. Chrome that front beam.
Re: My turquoise eleven window bus
Posted: Tue May 21, 2013 8:44 pm
by mozzie
deadkombi wrote:Too good to paint Josh. Chrome that front beam.
Oh i was wondering if you were still alive
Re: My turquoise eleven window bus
Posted: Tue May 21, 2013 10:08 pm
by Shaven
awesome Josh.
love the beam... yeah dont paint it. it deserves something special... top work mate.
Re: My turquoise eleven window bus
Posted: Thu May 23, 2013 11:13 pm
by joshroom
Cheers Ian, kind words indeed. Niko me and my mate hoodwink designed the sideplates on CAD an sent them out for laser cutting. Cheers to Matty n Mozz. Paul your a cheeky bugger I don't know if ya shit stirring or not hahahaha but I do know "chrome won't get you home" hahaha.
Jumped back onto the front while I waited for my dad to rock up and gimme a hand to hold the cargo door steady while I knocked out and re-pinned the top cargo hinge (thanks pop). It went as well as the bottom hinge. I got it hung and with both hinges done the gaps are looking heaps better (didn't get pics yet).
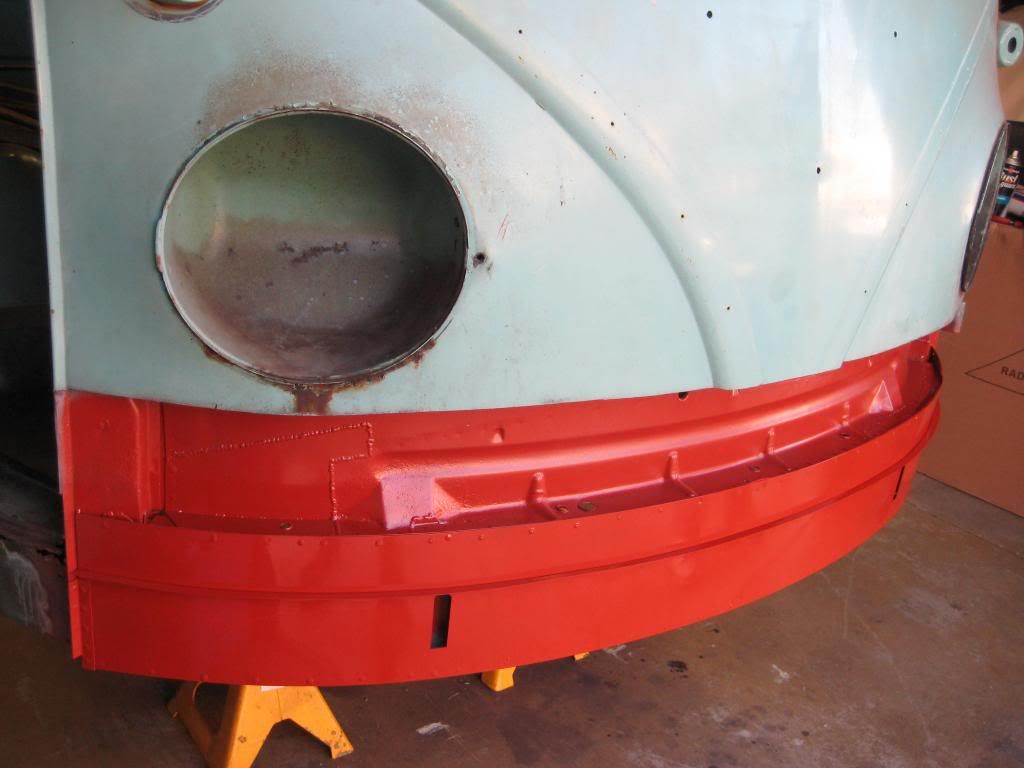
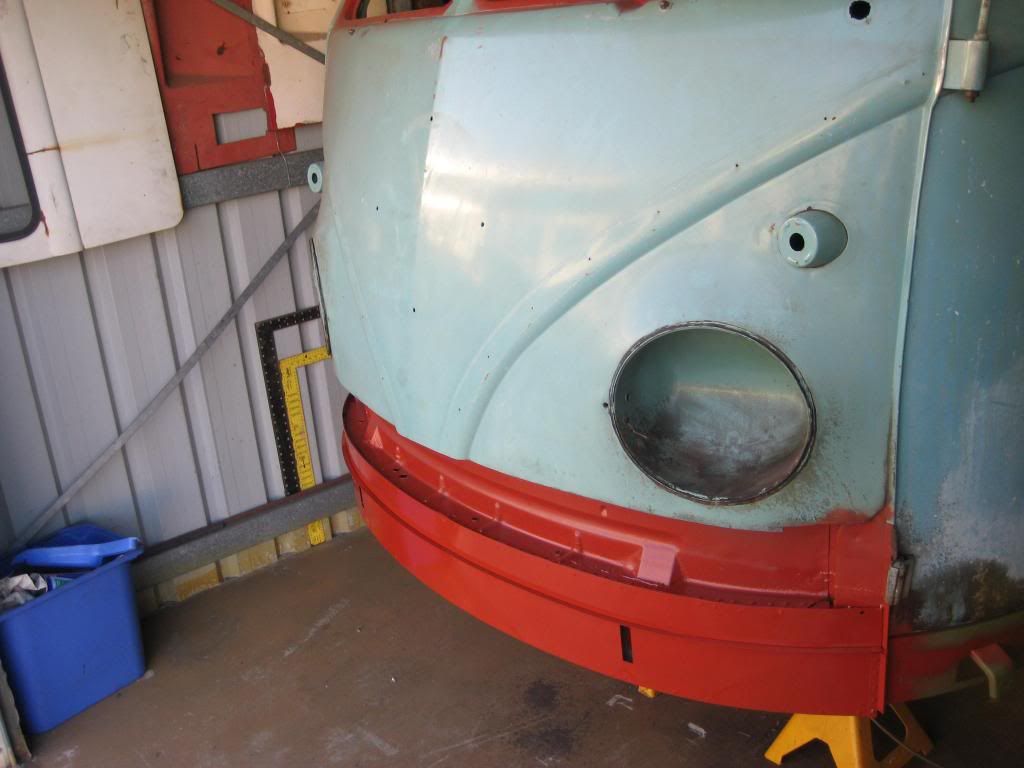
I got some pics of the lower outer panel going on and all welded, painted.
Epoxy enamel on the inside before welding on the outer.
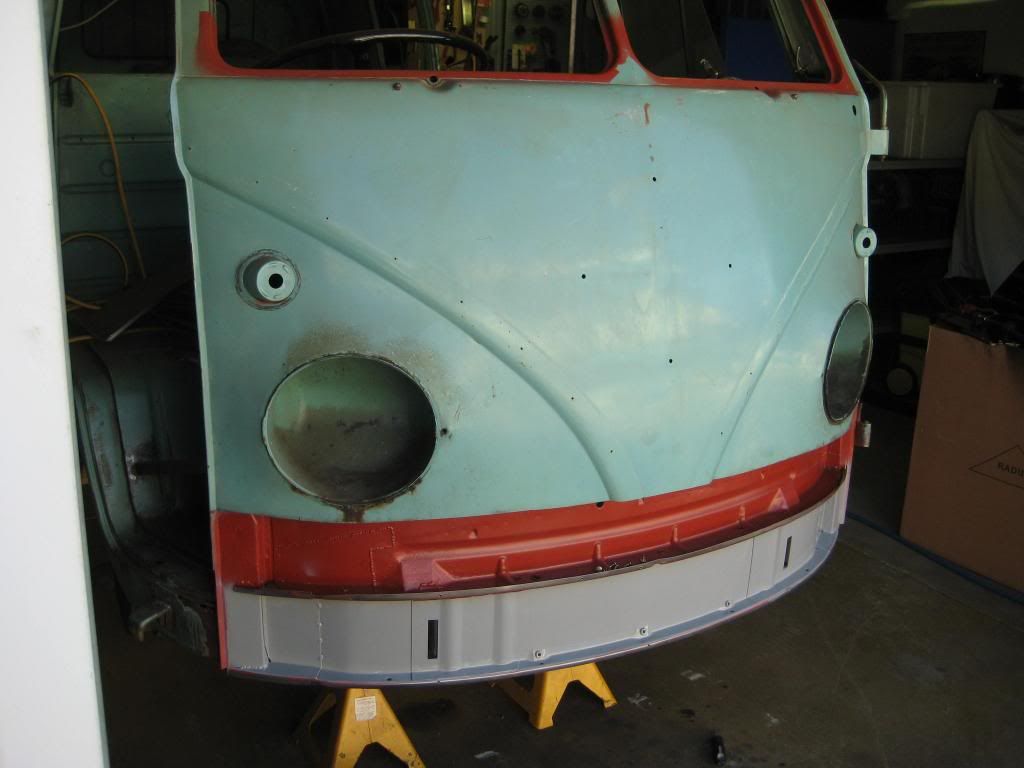
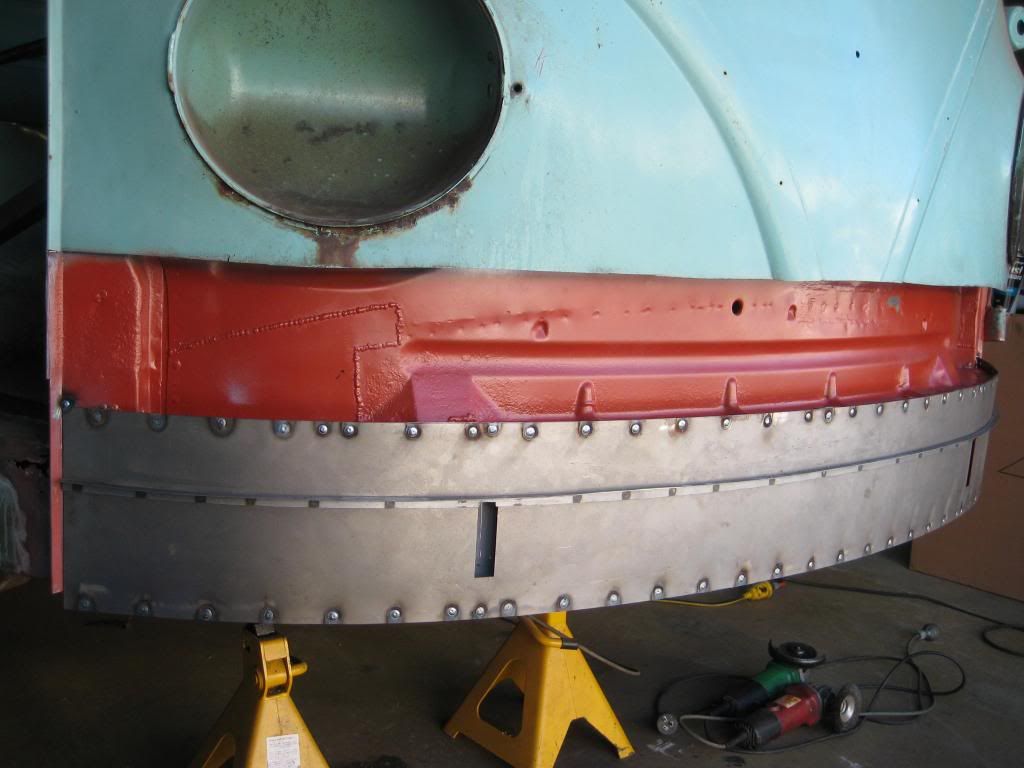
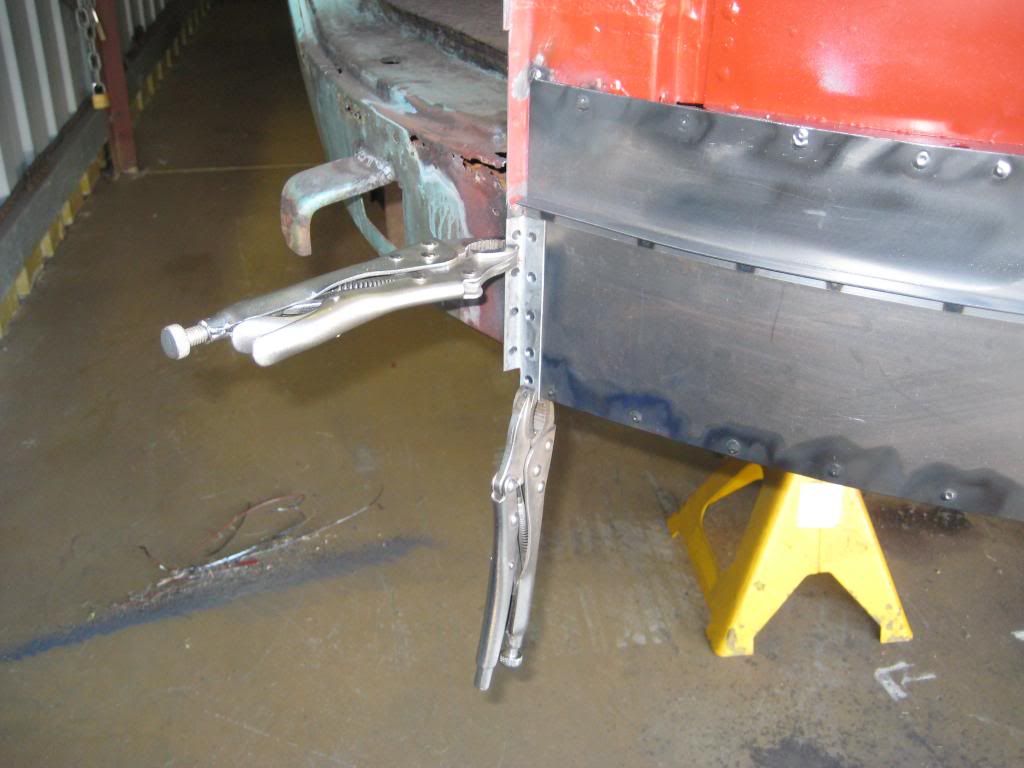
I cut off the flaps at the end of this panel to get it sitting right, so I then had to make up some angled pieces to weld back on the attach to the "A" pillars turned out neat enough.