Nathan's 67 Panel Resto

Post pics and info of your rides here split windows only

Moderators: warb, Rawdyn, Leroy, byronbus, Tonz Magonz, dmb

Post Reply
User avatar
Natwest
DSKer
Posts: 48
Joined: Fri Oct 10, 2008 10:29 am
Location: Brisbane - South

Nathan's 67 Panel Resto

Post by Natwest »

As promisd, here are the pics of the busses I have just bought. I dont know what year they are as yet, white one looks like a 61??? Blue I have no idea, late 60's???

Image

Image

Image

Image

Image

Image

Image

Image

Image

Image

Image

Image

Image

Image

Image

Image
Last edited by Natwest on Thu May 13, 2010 9:43 pm, edited 1 time in total.
zeuspig
DSKer
Posts: 1218
Joined: Tue Apr 03, 2007 5:00 pm
Location: Sunshine Coast

Post by zeuspig »

Nice work mate, what's the plans for them?
Ozbus
DSKer
Posts: 92
Joined: Sun Jun 07, 2009 12:33 pm
Location: nth coast

Post by Ozbus »

g'day nathan,nice score, saw your bay restoration thread on another site so i know these buses are in good hands, keep the pics coming, cheers dave
User avatar
matara
Admin
Posts: 1472
Joined: Wed May 18, 2005 11:34 pm
Location: Wahroonga, Sydney
Contact:

Post by matara »

Hi Nathan,

Welcome to dsk. I'm no expert but the later one looks like a 67 by the look of the radio cutout. The early one looks like a 1960/ early 61 model as it has high hinges. These went to low hinges out in April 61 I think.

Cheers

Steve
User avatar
kombi1976
DSKer
Posts: 3744
Joined: Thu Jan 25, 2007 2:59 pm
Location: Southern Tablelands

Post by kombi1976 »

Nice projects there.
Any plans for them yet are are you just taking stock at the mo?
Cheers & God Bless

'62 Beetle
'62 Panel project
'67 Panel
User avatar
baykruzer
DSKer
Posts: 543
Joined: Thu Jul 24, 2008 6:59 am
Location: Surfless Coast of Gold,QLD
Contact:

Post by baykruzer »

yeah buddy !!!!!!!
nice busses, they should keep you busy for a while

Are you going to keep the camper interior?

Cheers Glen
User avatar
Natwest
DSKer
Posts: 48
Joined: Fri Oct 10, 2008 10:29 am
Location: Brisbane - South

Post by Natwest »

Yeah, I am soooo stoked to get my hands on them.

So my plans at the moment are to just keep looking over them at the moment and take stock of exactly what I have. I spent 2 hours today just having a look at everywhere I could get to. My first initial hopes of doing both the busses up has now gone out the window. The white one, (the 60-61, thanks for that Steve) is beyond my skill to tackle. I might just keep it for now and wait until I win the lotto and pay to get it done. The blue one was originally a panel, (thanks for that Leon). So I dont think I will be keeping it a camper, and will be converting it back to a panel. It is actually quite good as far as rust is concerned. I checked out the doglegs and they are fine!!! Jack points are good, floor is solid, but I didn't get to see the front under the bumper. I reckon it will need to be done like all the rest of the splits I have seen. Doors need a bit of work. The bus has been painted with a brush in that light blue colour and it looks like that thick coat of paint kept some of the rust away.

Will be doing something similar to the lowlight resto (thanks for the comments Dave). I unfortunately won't be able to start for a little while though.

Thanks to the other lads for their comments.

(Glen, I am racing you. At the pace you are going, I reckon I have this in the bag :) )

Cheers - Nathan
User avatar
Natwest
DSKer
Posts: 48
Joined: Fri Oct 10, 2008 10:29 am
Location: Brisbane - South

Post by Natwest »

Alright then, I can finally start with the splitty.

Day one, Thursday 6th April 2010 - 3hrs work

Image

I had to have a real good look at exactly what is needed to be done. I decided to take the front wheels off, jack up the back so I can at least have a look underneath. As I got it without any gearbox or back wheels, I have never seen it underneath.

Image

Image

I also wanted to check out the worse parts of the bus.

Image

Image

Image

Image

Image

Day one complete:

Image
User avatar
Natwest
DSKer
Posts: 48
Joined: Fri Oct 10, 2008 10:29 am
Location: Brisbane - South

Post by Natwest »

Day 2, Monday the 10th April 2010 - 5 hrs work (not including the time WASTED at Bunnings waiting for service, :lol: )

Ok, time to clean this baby up. I had to ge rid of all that moss. If you like the 'rat' look, you might not want to look at the next few pics, as it would have been AWESOME to keep it like this, but the wife has put some requests forward, and one of these requests is to not drive around in a rusty/mossy van. So its getting a tidy up.

Before:

Image

After:

Image

Image

The clean up took a VERY long time. That moss did NOT want to come off!!! I then got some primer onto the roof.

Image

End of day two:

Image
zeuspig
DSKer
Posts: 1218
Joined: Tue Apr 03, 2007 5:00 pm
Location: Sunshine Coast

Post by zeuspig »

Great stuff mate, I will be watching the progress.
zeuspig
DSKer
Posts: 1218
Joined: Tue Apr 03, 2007 5:00 pm
Location: Sunshine Coast

Post by zeuspig »

Great stuff mate, I will be watching the progress.
User avatar
Natwest
DSKer
Posts: 48
Joined: Fri Oct 10, 2008 10:29 am
Location: Brisbane - South

Post by Natwest »

Day 3, Tuesday the 11th April 2010 - 5 1/2hrs work with special guest star VINNNIE!!!!!!

First of all, I must give a HUGE shout out to Vinnie who decided to come on out and spend the day with me working on the split. You are an absolute legend mate, and I cant thank you enough for coming over.

Alright, time to sand back some of this primer from yesterday.

Image

Then we hooked straight in to get some colour on the roof. I am just sticking with white, as I will be doing this bus in a two-tone for now.

Image

Image

Looking good so far...

Image

Ok, next we pulled off the bumper and got rid of the bumper bar. No pics of this process as we each took a side on this job and had it done quite quickly.

Ok, so with those bits gone from the front, it was just a matter of starting to tidy up on the front. We were using paint stripper, and sanding disks, but this stuff was tough!!! We managed to get the front windows out, and discovered it was virtually rust free on the sills apart from one small hole, approx 5mm big.

Image

Image

Image

So here is the final pic on day 3... we put the front glass back in just to keep some moisture out of the cab. And a HUGE thanks to Vinnie again, cheers mate!!!

Image
User avatar
Volksmuller
DSKer
Posts: 1298
Joined: Tue May 17, 2005 9:47 pm
Location: sydney australia

Post by Volksmuller »

judging by the original colour this bus may of been a x rothmans cig delivery truck....easy way to tell ...no front vw logo holes from the factory and no vw script holes in the tailgate. These buses were painted corporate colours..navy blue and were mostly panel vans....some had extra lockwood locks fitted below the cargo door lock for that extra security....looking good...cheers steve
Split Kathedral is where I do the' 12 stations of the split'.....praise to the holy whine of the reduction box and peace to all split lover's cronk 1:23
User avatar
baykruzer
DSKer
Posts: 543
Joined: Thu Jul 24, 2008 6:59 am
Location: Surfless Coast of Gold,QLD
Contact:

Post by baykruzer »

Kombi Rescue wrote:judging by the original colour this bus may of been a x rothmans cig delivery truck....easy way to tell ...no front vw logo holes from the factory and no vw script holes in the tailgate. These buses were painted corporate colours..navy blue and were mostly panel vans....some had extra lockwood locks fitted below the cargo door lock for that extra security....looking good...cheers steve
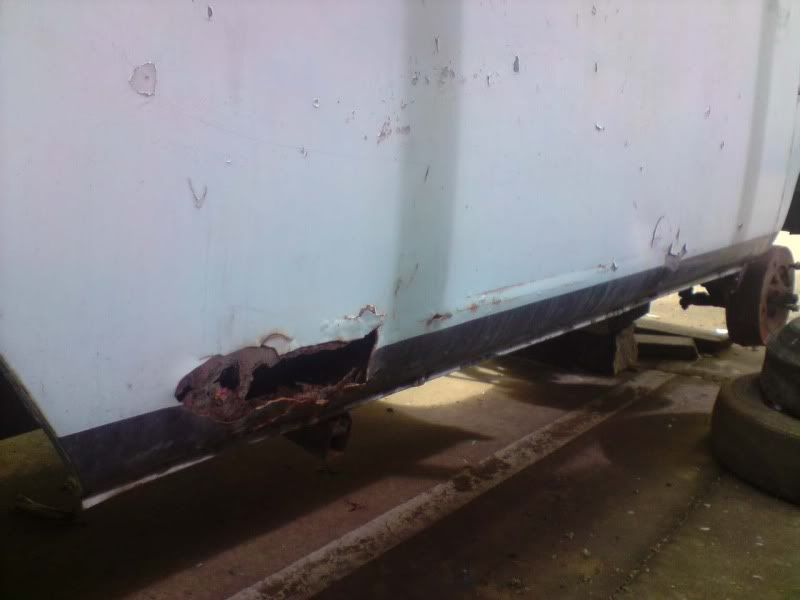
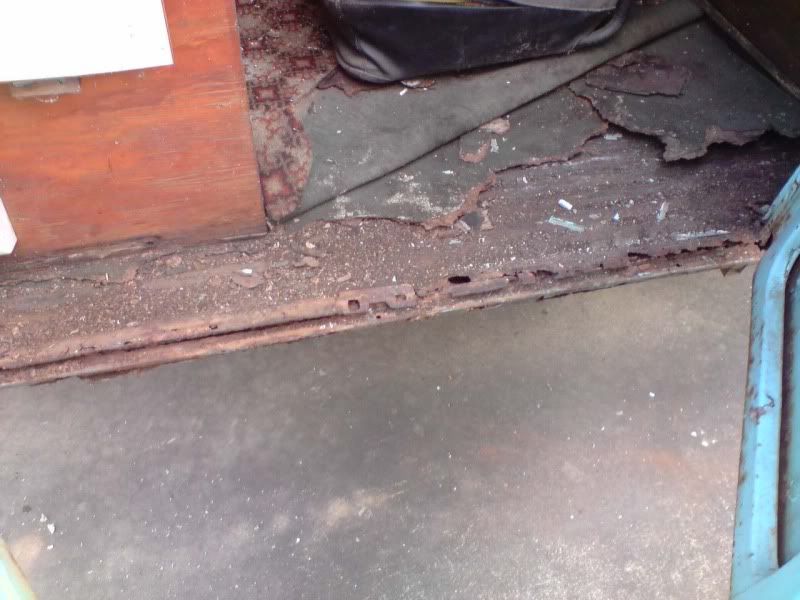
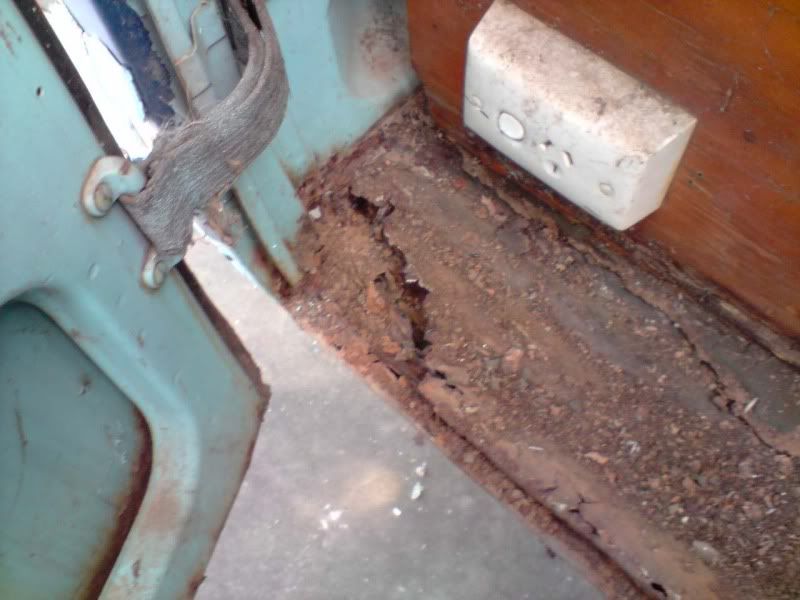
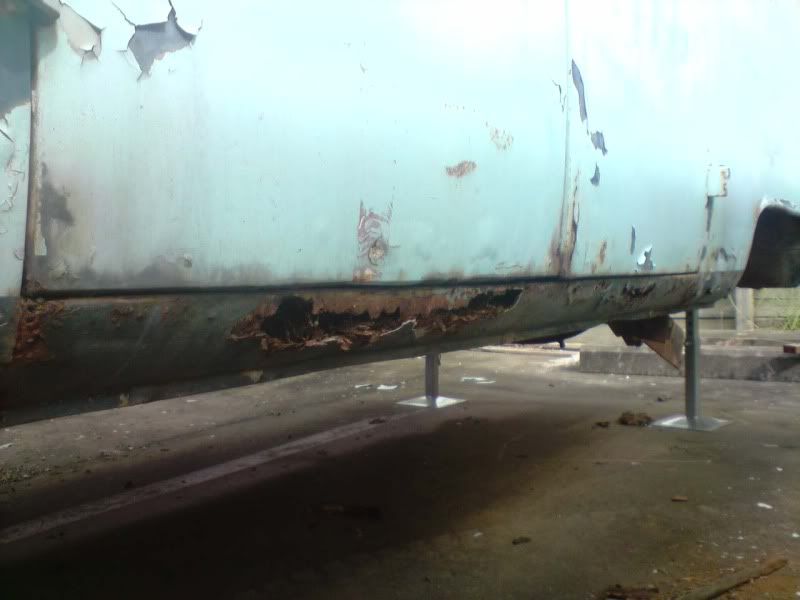
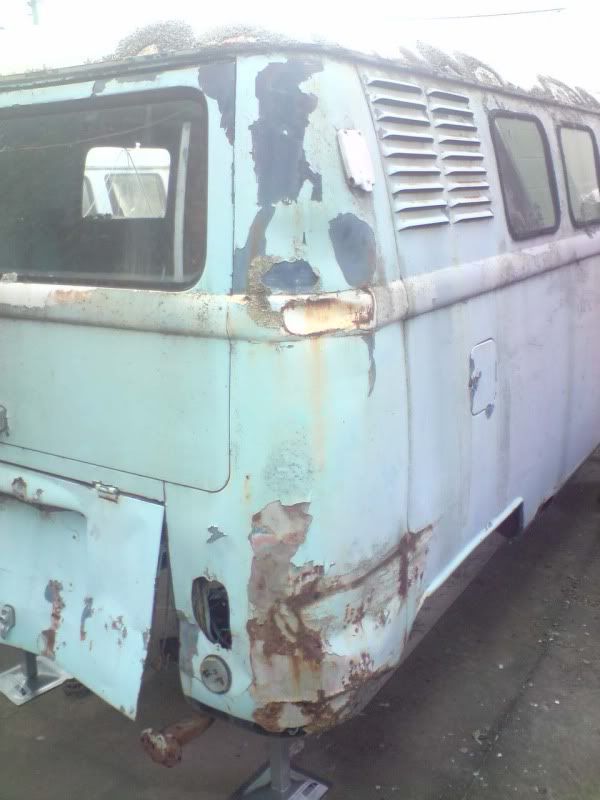
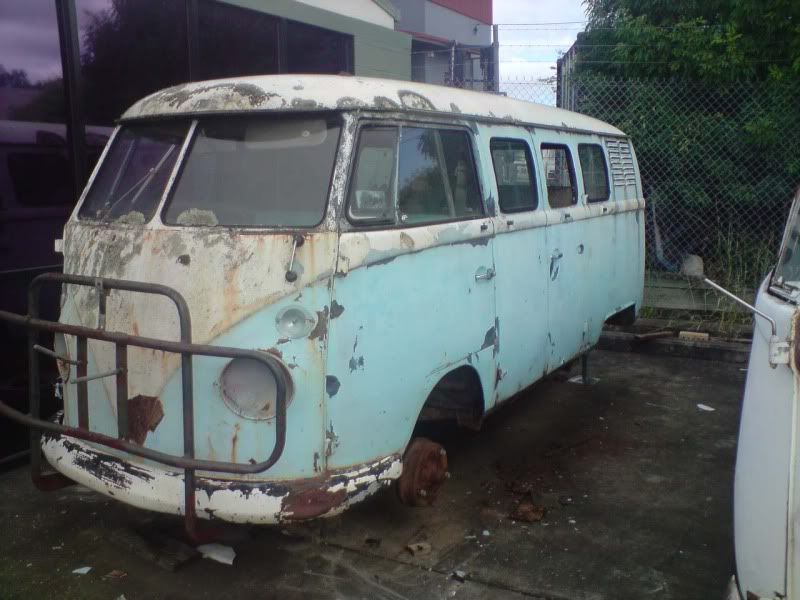
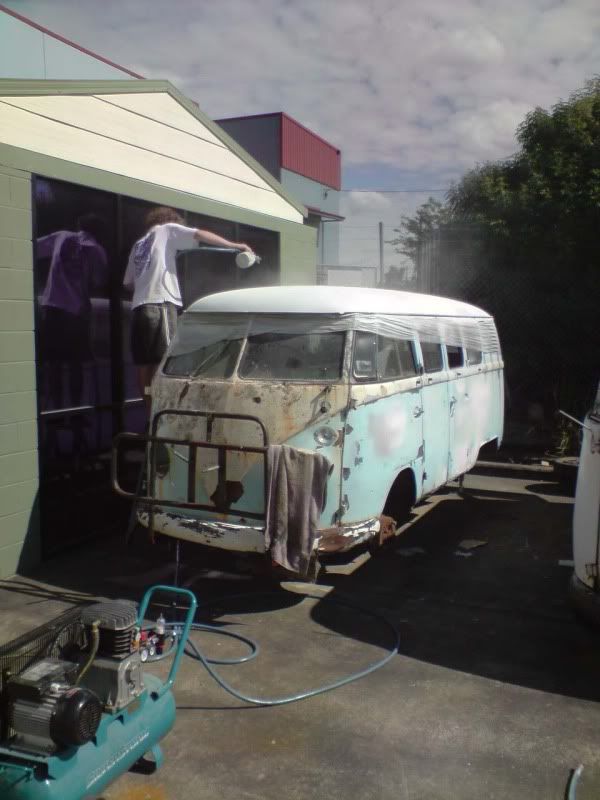
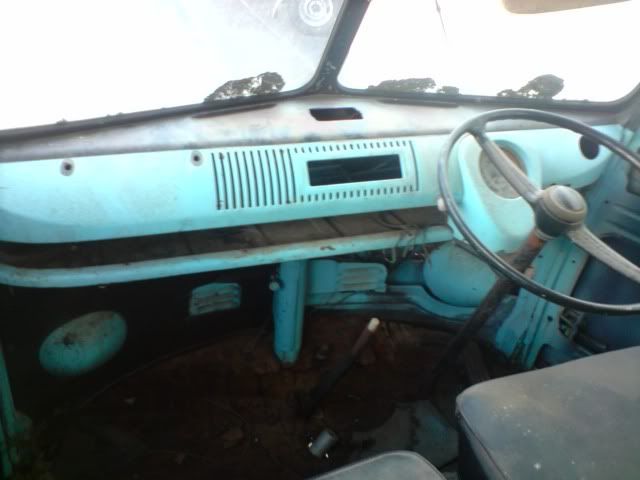
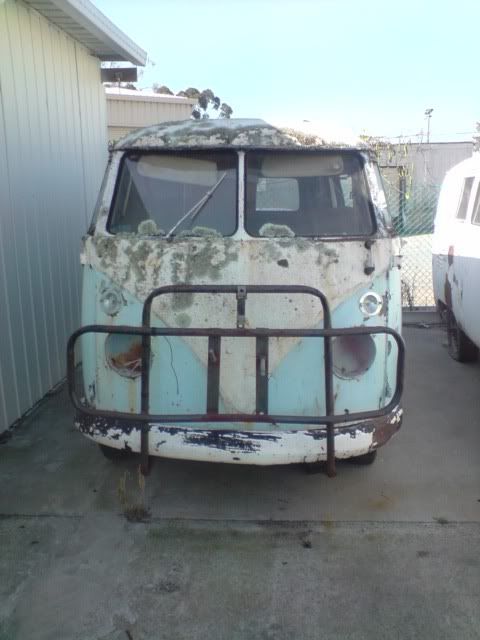
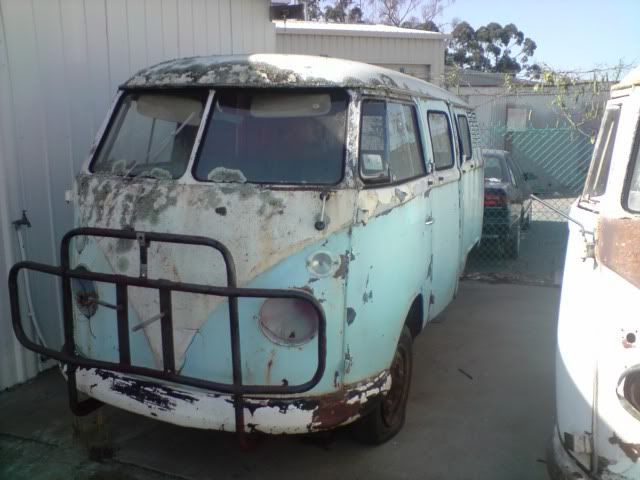
Hey Nathan, how would the boss go if you put the rothmans decals back on the bus?
sure would look the goods
GLEN

1962 11 window project
viewtopic.php?t=8698


CHECK OUT ......... www.kustomkombi.com
Post Reply