1960 Split Window Resto/Rebuild
Moderators: warb, Rawdyn, Leroy, byronbus, Tonz Magonz, dmb
- VRSenator065
- DSKer
- Posts: 576
- Joined: Sun Jun 01, 2014 9:47 pm
- Location: Gawler SA
Re: 1960 Split Window Resto/Rebuild
Agreed using a 2.5t crane for little spot welder sure is overkill but the concept works. I have some spare 40mm rhs going to make a smaller light weight 3 legged base and mount the ram assembly to that. Then want to make a mount plate on the welder so I can use it on its side easily. I reckon it's going to get a bit of use so may as well make it easier to use.
- bulliboy
- DSKer
- Posts: 1446
- Joined: Tue Oct 02, 2007 11:32 pm
- Location: Port Macquarie now YIPEE!
Re: 1960 Split Window Resto/Rebuild
Just harden up mate and work those guns .MVRSenator065 wrote:Agreed using a 2.5t crane for little spot welder sure is overkill but the concept works. I have some spare 40mm rhs going to make a smaller light weight 3 legged base and mount the ram assembly to that. Then want to make a mount plate on the welder so I can use it on its side easily. I reckon it's going to get a bit of use so may as well make it easier to use.
- VRSenator065
- DSKer
- Posts: 576
- Joined: Sun Jun 01, 2014 9:47 pm
- Location: Gawler SA
Re: 1960 Split Window Resto/Rebuild
Just testing Ian's image posting method.
- VRSenator065
- DSKer
- Posts: 576
- Joined: Sun Jun 01, 2014 9:47 pm
- Location: Gawler SA
Re: 1960 Split Window Resto/Rebuild

Just posted this simply by pasting the image location out of Facebook, pretty simple
- VRSenator065
- DSKer
- Posts: 576
- Joined: Sun Jun 01, 2014 9:47 pm
- Location: Gawler SA
Re: 1960 Split Window Resto/Rebuild
Well thanks to a very helpful member (vanell/Ian) on here i have located the last major part of the puzzle and now have an ice pick style drivers front door  He also chucked in an engine lid that hopefully I can make one good one out of the two I now have. Continue to be so impressed with the camaraderie of the VW bus community. Dropped the door off at the blasters at lunch time. Should have them all back from blasting on Wednesday. Also scored a cargo door lock.


- VRSenator065
- DSKer
- Posts: 576
- Joined: Sun Jun 01, 2014 9:47 pm
- Location: Gawler SA
Re: 1960 Split Window Resto/Rebuild
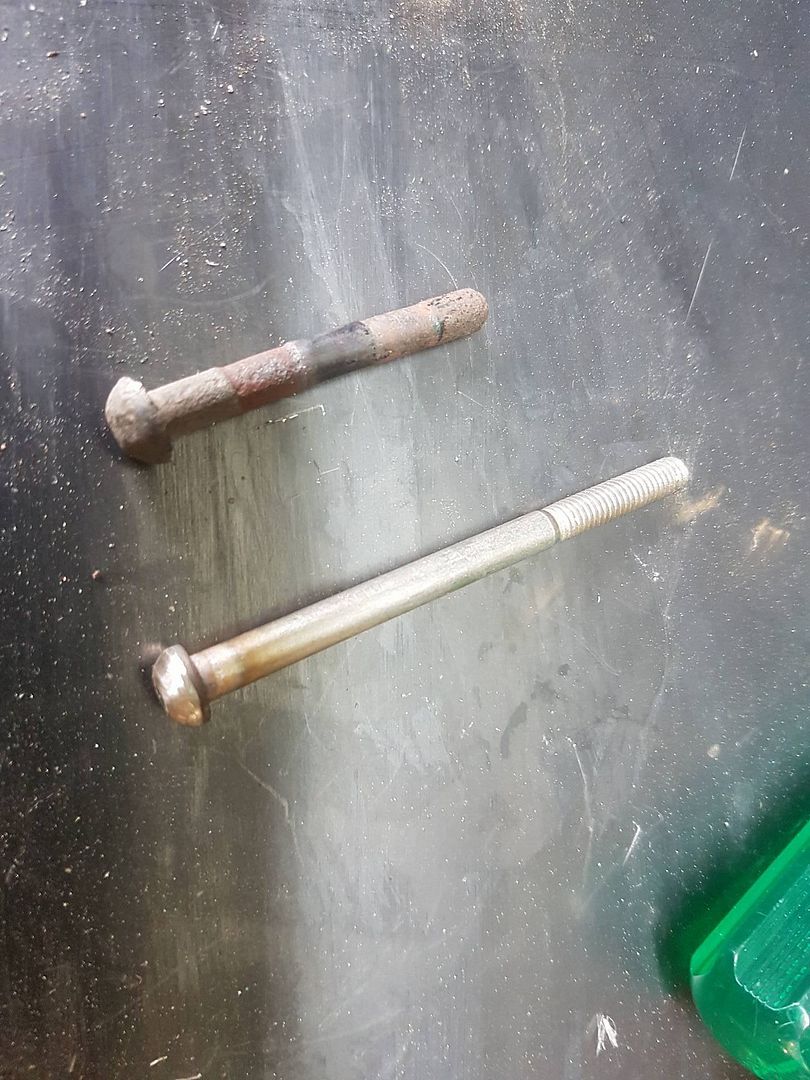
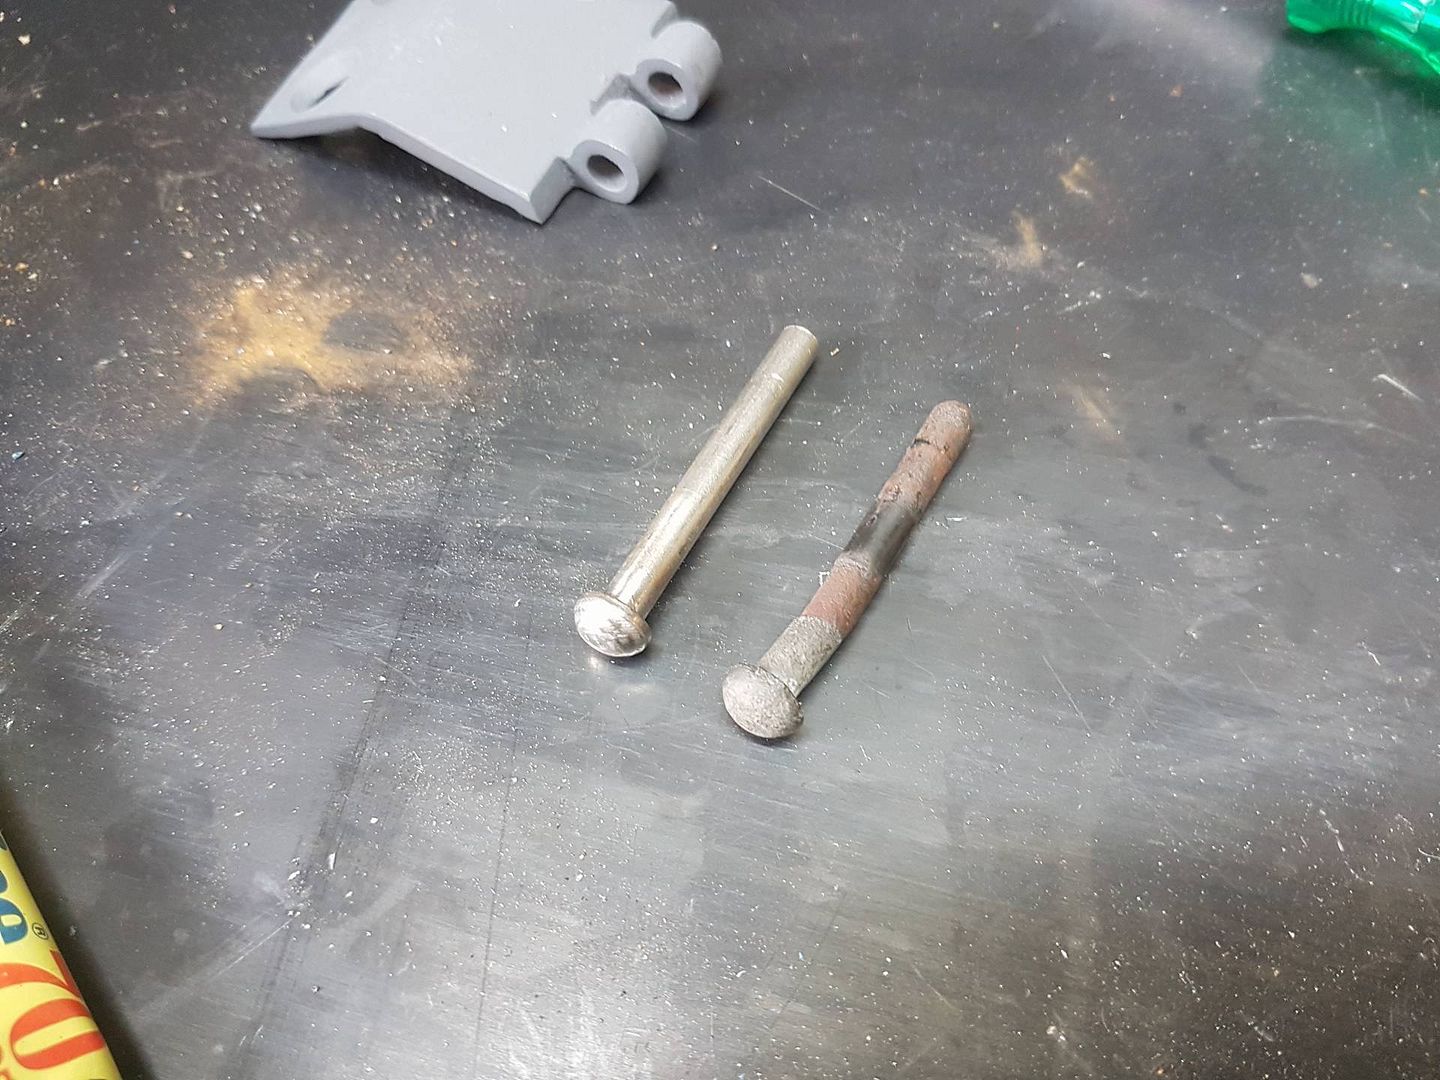
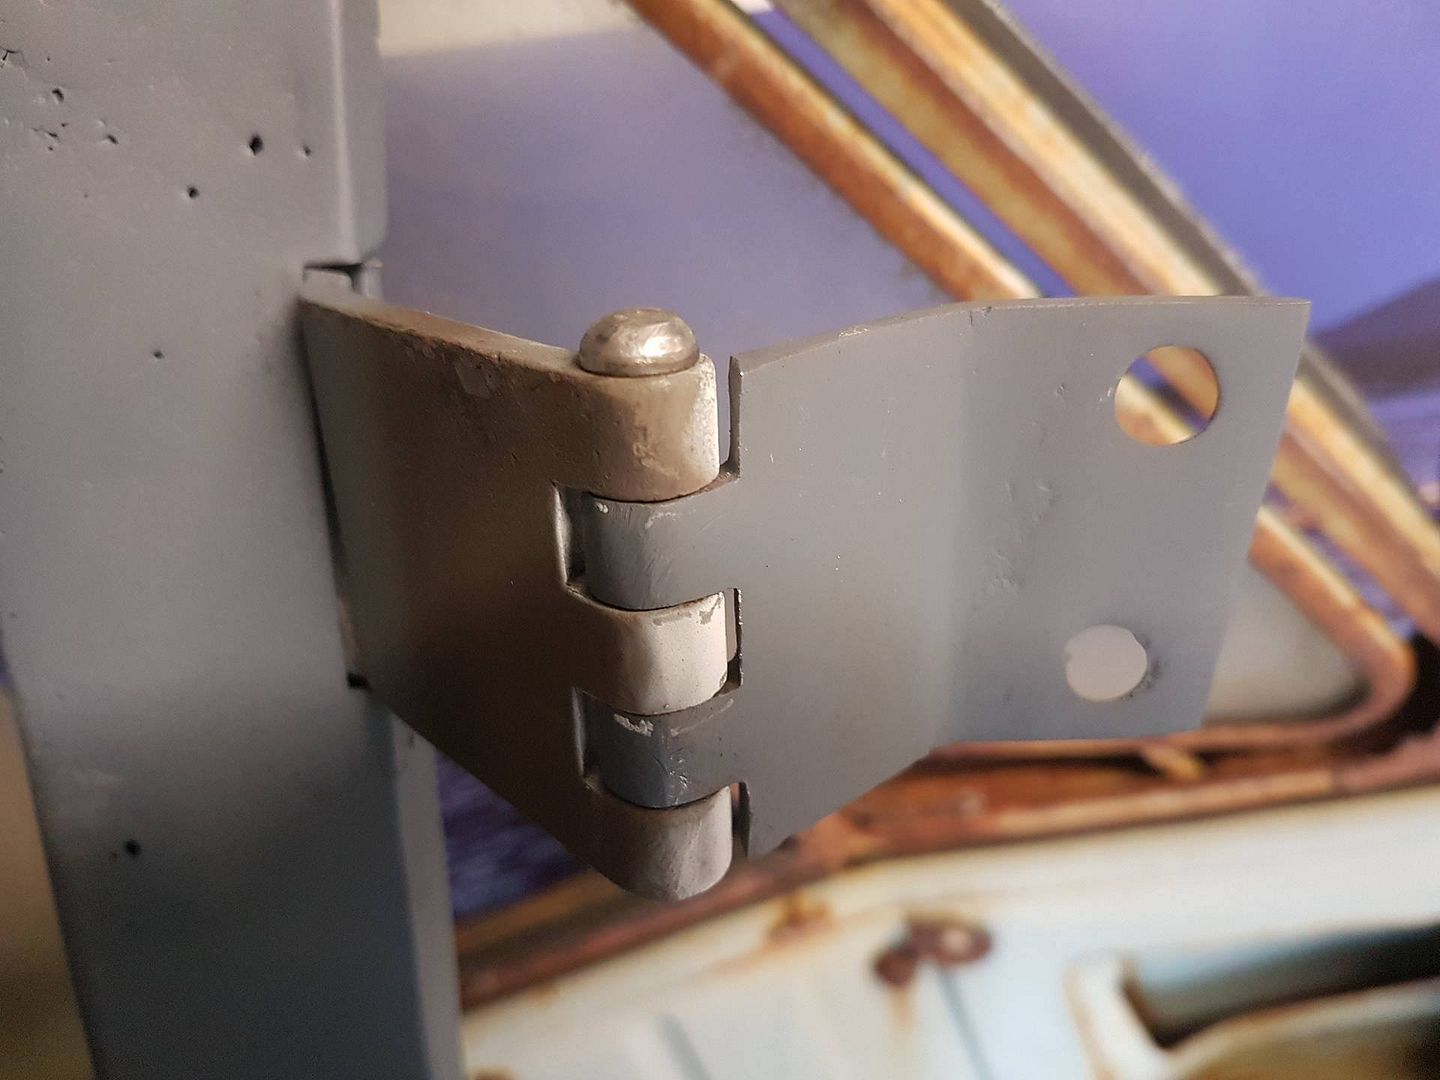
Got a little bit more done. So apparently my year bus would have had the cargo door hinge pins that are domed on top. I know a lot of people just use roll pins but i thought I would have a bit of a play around at how hard it would be to make some up. I just used an M6 stainless socket head cap screw I had. Used the tig to fill in the hex, then had a play on the lathe. I think the idea will work. Would be simpler with a regular hex headed bolt, as I wouldn't need to tig at all. So will pick up some of them and have a go at making the hinge pins maybe next week.


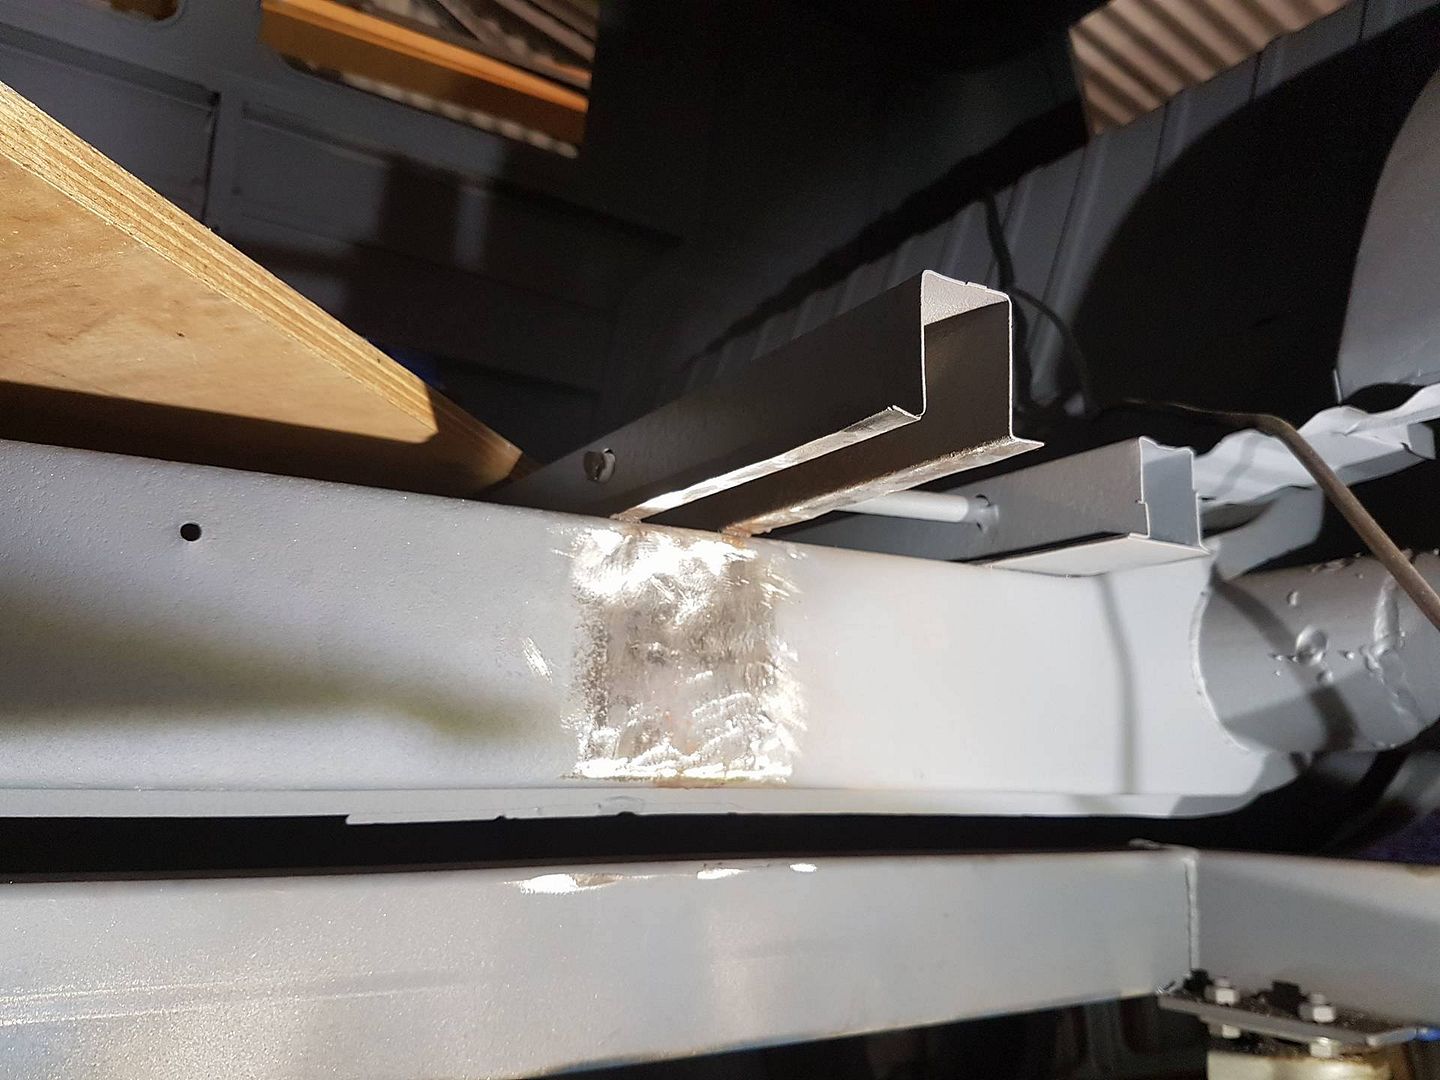
Also removed what was left of the outrigger at the rear to see what was involved, relatively simple job. Have some new parts hopefully arriving this week to start the rebuild of the cargo floor area so should be a bit of fun.

Kicking myself though that on eBay there was a small collection of bits that included the hinge half I need. I had actually set a reminder on my phone for just before the auction was ending but was under the bus grinding and didn't hear it. My loss someone eases gain I guess!!


Also removed what was left of the outrigger at the rear to see what was involved, relatively simple job. Have some new parts hopefully arriving this week to start the rebuild of the cargo floor area so should be a bit of fun.

Kicking myself though that on eBay there was a small collection of bits that included the hinge half I need. I had actually set a reminder on my phone for just before the auction was ending but was under the bus grinding and didn't hear it. My loss someone eases gain I guess!!
- rabidkombi
- DSKer
- Posts: 643
- Joined: Sun Mar 27, 2011 8:48 am
- Location: Hills District,Sydney
Re: 1960 Split Window Resto/Rebuild
Awesome work on the pins mate 
- 63 left hooker
- DSKer
- Posts: 1219
- Joined: Tue Nov 24, 2009 1:03 pm
- Location: Northern Beaches Sydney
- VRSenator065
- DSKer
- Posts: 576
- Joined: Sun Jun 01, 2014 9:47 pm
- Location: Gawler SA
Re: 1960 Split Window Resto/Rebuild
Thanks guys, bloody cold here in Adelaide this weekend so not huge progress. But hoping to receive some of the new panels this week, also all the doors back from blasting so that should be fun.
-
ogrule
- DSKer
- Posts: 114
- Joined: Sun Jun 01, 2014 9:46 pm
Re: 1960 Split Window Resto/Rebuild
Love the pin manufacture mate
- VRSenator065
- DSKer
- Posts: 576
- Joined: Sun Jun 01, 2014 9:47 pm
- Location: Gawler SA
Re: 1960 Split Window Resto/Rebuild
Just trying out linking images using Google photos.
Last edited by VRSenator065 on Sun Jul 23, 2017 4:24 pm, edited 1 time in total.
- VRSenator065
- DSKer
- Posts: 576
- Joined: Sun Jun 01, 2014 9:47 pm
- Location: Gawler SA
Re: 1960 Split Window Resto/Rebuild
That's a busy weekend, seem to spend a lot of time but don't always have a whole lot to show for it.
My doors came back from the blasters during the week, and I also got about half the stuff I need for the cargo floor area delivered, the other is waiting on stock. So was pretty eager to make a start.

Started on the rear cross member and out riggers. Before removing the cross member I fitted the out rigger in place and welded it up so that I had a datum to work too for the position of the cross member. This was a pretty significant moment as its the first time anything new has actually been fitted back onto the bus, not cut off!!

So them removed the cross member. man this thing is going to be 50kg lighter just from all the dirt and mud that accumulated in every nook and cranny over the years!

Then welded the cross member and other out rigger, was pretty happy with the result, although my welding was a little hit and miss.

So today i decided to do the front cross member and out riggers.

Very happy with how that all turned out.

But also very happy with staring to get my welds sorted. Thought i might share a couple of things i have learned, of course if anyone has any other tips fire away. One of the members here suggested using 0.6mm mig wire for the body panels. This was excellent, way less blows throughs and more control. But, (and there is always a but!!) When doing these parts, as they needed a bit more amps the wire was so thin it just wasn't up to it and would just blow away almost (I am sure there is a more technical term!!)
So I decided to change back to the 0.8mm wire, and bingo much much better. I also noticed that if I had the torch closer it was better, I am guessing that has to do with the gas, so i cranked up the flow of gas a little and again much better. Very happy now.

So then I decided just for fun to put the doors on to get some inspiration, but also to show my wife Sue , who was vary happy
(happy wife, happy life!!!)

So all in all a great week end, feel like I am making progress all the time.
My doors came back from the blasters during the week, and I also got about half the stuff I need for the cargo floor area delivered, the other is waiting on stock. So was pretty eager to make a start.

Started on the rear cross member and out riggers. Before removing the cross member I fitted the out rigger in place and welded it up so that I had a datum to work too for the position of the cross member. This was a pretty significant moment as its the first time anything new has actually been fitted back onto the bus, not cut off!!

So them removed the cross member. man this thing is going to be 50kg lighter just from all the dirt and mud that accumulated in every nook and cranny over the years!

Then welded the cross member and other out rigger, was pretty happy with the result, although my welding was a little hit and miss.

So today i decided to do the front cross member and out riggers.

Very happy with how that all turned out.

But also very happy with staring to get my welds sorted. Thought i might share a couple of things i have learned, of course if anyone has any other tips fire away. One of the members here suggested using 0.6mm mig wire for the body panels. This was excellent, way less blows throughs and more control. But, (and there is always a but!!) When doing these parts, as they needed a bit more amps the wire was so thin it just wasn't up to it and would just blow away almost (I am sure there is a more technical term!!)
So I decided to change back to the 0.8mm wire, and bingo much much better. I also noticed that if I had the torch closer it was better, I am guessing that has to do with the gas, so i cranked up the flow of gas a little and again much better. Very happy now.

So then I decided just for fun to put the doors on to get some inspiration, but also to show my wife Sue , who was vary happy
(happy wife, happy life!!!)

So all in all a great week end, feel like I am making progress all the time.
- bulliboy
- DSKer
- Posts: 1446
- Joined: Tue Oct 02, 2007 11:32 pm
- Location: Port Macquarie now YIPEE!
Re: 1960 Split Window Resto/Rebuild
great update keep them coming. BTW i wish I could weld like that. M
-
braddick
- DSKer
- Posts: 974
- Joined: Fri May 17, 2013 1:07 pm
Re: 1960 Split Window Resto/Rebuild
Looks pretty good to me, always enjoy logging on to see if u have updated your build thread
Keep the pics coming
U heading over to swap meet this weekend be good to put face to a name
Cheers
Keep the pics coming
U heading over to swap meet this weekend be good to put face to a name
Cheers
- VRSenator065
- DSKer
- Posts: 576
- Joined: Sun Jun 01, 2014 9:47 pm
- Location: Gawler SA
Re: 1960 Split Window Resto/Rebuild
Cheers guys, the welding was starting to annoy me tbh. I have actually never had a lesson with a mig but I pride myself at being able to work most things out. Feel like now I am starting to get a feel for what its doing. Was the same when I started out with tig when i built the exhaust for the Senator. By the end of that job I was welding quite well, trouble is you cant go back and start over!! Tig was a little easier though as my grandad when I was a kid taught me to oxy weld, and tig is sort of like an electric version of oxy. Mig is a little different, for me its relatively easy to weld heavy thickness material, like on the dolley etc. But doing thin wall, or like this a mixture of thin outriggers to the thick chassis is much more difficult (for me anyway). But its all part of the process, welding is so satisfying when you get it right 
Probably wont get across to the swap meet this year, I have a fair bit going on at the moment, but will definitely be hooking up with the VW community as we get further along. Am I right there is a big get together on the southern coast of Vic each year? Last year we were thinking of coming along just to get some ideas but it clashed with a holiday we had planned. Not sure if its always in the same place each year?
I plan to keep the thread going, I do have it on the Samba only as that place seems like it has some awesome info, but here is the home of the Aussie VW bus crowd. Facebook is ok, but forums are just a much better resource as you get to know who is telling you what and the advice generally is so much more accurate Thanks for looking and commenting!
Probably wont get across to the swap meet this year, I have a fair bit going on at the moment, but will definitely be hooking up with the VW community as we get further along. Am I right there is a big get together on the southern coast of Vic each year? Last year we were thinking of coming along just to get some ideas but it clashed with a holiday we had planned. Not sure if its always in the same place each year?
I plan to keep the thread going, I do have it on the Samba only as that place seems like it has some awesome info, but here is the home of the Aussie VW bus crowd. Facebook is ok, but forums are just a much better resource as you get to know who is telling you what and the advice generally is so much more accurate
