VRSenator065 wrote:Looks like welding it is! Thanks all. Can anyone suggest someone's build thread that goes through rebuilding the cargo floor area including the I beams, top hats and front section where the cargo doors close? Just like to read up a bit as a refresher before getting stuck in. Thanks again all.
I did all of this sections on my bus, have a look through my pics and if you need more pics I’ll send you the directors cut. I’ve got hundreds of pics of all the work. Beerdocs thread on his panel was one I always used as a guide too but I don’t think he did a floor.
Do you have at least 2 complete I beams (even really rusty) on both sides? If so, clamp the inner sill to them and just fit all the new stuff to match that. As long as the inner sill is straight that will put them all in the right place.
splitthis wrote:I did all of this sections on my bus, have a look through my pics and if you need more pics I’ll send you the directors cut. I’ve got hundreds of pics of all the work. Beerdocs thread on his panel was one I always used as a guide too but I don’t think he did a floor.
Do you have at least 2 complete I beams (even really rusty) on both sides? If so, clamp the inner sill to them and just fit all the new stuff to match that. As long as the inner sill is straight that will put them all in the right place.
Great thank you. Actually I have already done the 4 outriggers before I stopped working on it last time. I was planning on using the new side end pieces (sorry i am not up with all the names yet!!) as the guide. The old rusty I beams are still in place. I was going to carefully measure off their centre distances off each other, then fit the new ones one at a time. I am just not totally sure what the end details of the side pieces is meant to be.
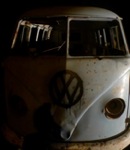
This is how it sits now.
Last edited by VRSenator065 on Sat Dec 28, 2019 2:49 pm, edited 1 time in total.
Use the shift rod as your Datum, that's the important part, I assume you have a new one to put in, do all 5 new floor supports at the same time, and don't trust that those new parts are the correct length, set them all up on the chassis with the shift rod in do the 2 end ones first , get them square and work from there, then do the long side panel repair before you put the floor in, that way you can get your hand in there to dolly it around, then floor in and keep a eye on the opening for the cargo doors, B pillar and C pillar repair, then cargo doors on then fit the cargo door sill, Ill give you the weekend to do it, get cracking . Ian
vanell wrote:Ill give you the weekend to do it, get cracking . Ian
Well if it wasn't going to be 40 up here everyday for the next few I might have taken you up on that!!
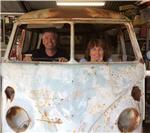
That's it for today, just too hot out there. Got the old I beams off, lots of back and forth to the hardware store to get set back up again, but really enjoying it. Took Ian's advice and concentrated on using the new shift tube as the datum. Just took my time. Nothing is welded up yet, just clamped or temp screwed in place. Great to be back putting new sound metal back into it. Actually its lined up pretty much spot on with the outer rail, so that's got to be good thing. Happy days!!
Last edited by VRSenator065 on Sat Dec 28, 2019 2:45 pm, edited 2 times in total.
Can any of you please point me in the right direction of how this area should look when finished? Its a little difficult when it all pretty much rusted away. Am I right that I only have got the B Pillar Outer, and what i need is a B Pillar Inner section? Is that all, will that finish off that area so the new dog leg attaches to it?
I am also unsure how the longitudinal C section steel finishes both ends?
Thanks in advance, all help very much appreciated!!
Does anybody know if the Admins will allow me to go back and edit my earlier posts to restore the image links so it makes sense? I don't use Photobucket anymore since they went feral, but my build thread is a little strange without the pics?
Insanely hot over here, so up at 7 to get an early start, too hot by 1pm. Think I have sorted the side runner end detail, folded and welded it, have left the front end a little long but can trim that back. Practiced a lot of plug welds and got the welding settings good I think. Then went to the bus and very happy with how they all turned outs so the top hat section behind the drivers compartments is now fully welded. Certainly gaining in confidence with my welds. 43 again tomorrow, so will do a morning again, but having fun.