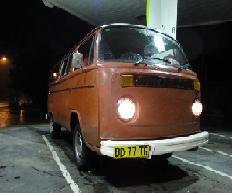
Kuch's 1956 11 Window Kombi Project [16-09-08]
Moderators: warb, Rawdyn, Leroy, byronbus, Tonz Magonz, dmb
-
warb

- Mod
- Posts: 7511
- Joined: Mon May 16, 2005 5:15 pm
- Location: Penrith, Nsw, Australia
- Contact:
-
cassa
- DSKer
- Posts: 1393
- Joined: Fri Sep 29, 2006 9:33 am
- Location: Sydney, Australia
-
Kuchster

- DSKer
- Posts: 495
- Joined: Sun Dec 02, 2007 10:12 pm
- Location: Sydney West
Today Sunday (Didnt do anything yesterday) Got the sill in place and other preparation.
Bending the sill a little more to fit with the dogleg shape.

Cutting out rusty section the size of the new sill.

Checking for size.

Adding drip points, again working with the oxy.

Mmm tacked in place

Organising the end of sill (wheel arch) shaping.

Drawn up as a trace from opposite side which is still original.

Doesnt that look sexy?

Sill all welded in place ready for finishing with the grinder.

Cutting out rotten sections in the back end from the early days panel beating job. Lotsa brass in there.

Thats starting to look better

And always around for an inspection, isnt it cute?

Kuch
Bending the sill a little more to fit with the dogleg shape.
Cutting out rusty section the size of the new sill.
Checking for size.
Adding drip points, again working with the oxy.
Mmm tacked in place
Organising the end of sill (wheel arch) shaping.
Drawn up as a trace from opposite side which is still original.
Doesnt that look sexy?
Sill all welded in place ready for finishing with the grinder.
Cutting out rotten sections in the back end from the early days panel beating job. Lotsa brass in there.
Thats starting to look better
And always around for an inspection, isnt it cute?
Kuch
-
splitbus07
- DSKer
- Posts: 615
- Joined: Thu Nov 08, 2007 11:43 am
- Location: North Balgowlah, Sydney
-
Kuchster
- DSKer
- Posts: 495
- Joined: Sun Dec 02, 2007 10:12 pm
- Location: Sydney West
-
splitbus07
- DSKer
- Posts: 615
- Joined: Thu Nov 08, 2007 11:43 am
- Location: North Balgowlah, Sydney
-
Leroy
- DSKer
- Posts: 2544
- Joined: Thu Jul 05, 2007 11:58 pm
- Location: Brisbane (bayside)
-
kombi1976
- DSKer
- Posts: 3744
- Joined: Thu Jan 25, 2007 2:59 pm
- Location: Southern Tablelands
-
Shaven

- DSKer
- Posts: 7420
- Joined: Tue Sep 19, 2006 4:17 pm
-
Kuchster
- DSKer
- Posts: 495
- Joined: Sun Dec 02, 2007 10:12 pm
- Location: Sydney West
Well with all the rain, dont think much will be happening this weekend.
Kuch
Kuch
Kuch's Laser Cut Products
http://www.kuch.com.au/laser
http://www.kuch.com.au/laser
-
Karmann1

- DSKer
- Posts: 216
- Joined: Tue Aug 07, 2007 9:36 pm
- Location: Mildura
Well if there's too much rain you can come to my place and work on mine! no rain here!
Good to see the puss is attracted to VW busses
Kuch you are awesome, your work is inspirational. Fanfukentastic.
I'm keen to see the ghia project next!
Dan.
Good to see the puss is attracted to VW busses
Kuch you are awesome, your work is inspirational. Fanfukentastic.
I'm keen to see the ghia project next!
Dan.
My busses may be rusty and they may not go but damn, they look cool!
-
ppp
- DSKer
- Posts: 575
- Joined: Fri Sep 02, 2005 3:58 pm
- Location: Bangkok, Thailand.
- Contact:
-
Kuchster
- DSKer
- Posts: 495
- Joined: Sun Dec 02, 2007 10:12 pm
- Location: Sydney West
Finally some better weather, well for the day anyway, looks pretty dark right now.
Put the valance and engine lid on to get everything in place.
Also, will be making brand new valances soon, will keep you posted, let me know if you have any interest.
Preparing the rust repair section on the outer wheel arch

Well, not rusty anymore is it?

Preparing the battery tray and engine area plates section

Weld a few new pieces on due to damage, trying to keep what we can due to being a hard to make section, although possible, but very time consuming.

Tacked in place, also note the tensioner on the left, due to an earlier accident years ago, it has changed shape in part of the body. Had to pull it into place before welding and tacked everything in place to keep it there.

Lookin better

All tacked in place and lookin much better!

New section for the lower wheel arch, note all edges are also bent

Well, that looks like next weekend.

Enjoy once again.
Kuch
Put the valance and engine lid on to get everything in place.
Also, will be making brand new valances soon, will keep you posted, let me know if you have any interest.
Preparing the rust repair section on the outer wheel arch
Well, not rusty anymore is it?
Preparing the battery tray and engine area plates section
Weld a few new pieces on due to damage, trying to keep what we can due to being a hard to make section, although possible, but very time consuming.
Tacked in place, also note the tensioner on the left, due to an earlier accident years ago, it has changed shape in part of the body. Had to pull it into place before welding and tacked everything in place to keep it there.
Lookin better
All tacked in place and lookin much better!
New section for the lower wheel arch, note all edges are also bent
Well, that looks like next weekend.
Enjoy once again.
Kuch
Kuch's Laser Cut Products
http://www.kuch.com.au/laser
http://www.kuch.com.au/laser
-
warb
- Mod
- Posts: 7511
- Joined: Mon May 16, 2005 5:15 pm
- Location: Penrith, Nsw, Australia
- Contact:

