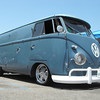
Kuch's 1956 11 Window Kombi Project [16-09-08]
Moderators: warb, Rawdyn, Leroy, byronbus, Tonz Magonz, dmb
-
warb

- Mod
- Posts: 7511
- Joined: Mon May 16, 2005 5:15 pm
- Location: Penrith, Nsw, Australia
- Contact:
-
joshroom
- DSKer
- Posts: 487
- Joined: Sat Jul 21, 2007 11:08 pm
- Location: perth
hey kuchman, i have discovered a small amount of brass on the seam conecting the front left floor section to the lower front section of the front left wheel arch, do you think they used any brass from factory as there is no sign of damage (except for the rust of coarse.) P.S is brass normally applied with an oxy. 2ND P.S good to see such a thorough resto!
____________
-
Rat214

- DSKer
- Posts: 234
- Joined: Fri Jun 01, 2007 1:48 pm
- Location: East Warburton, Victoria
-
Kuchster

- DSKer
- Posts: 495
- Joined: Sun Dec 02, 2007 10:12 pm
- Location: Sydney West
There is brass welding all over the bus from factory so thats nothing to be worried about.
The problem i had was brass patching on panels from previous repairs.
Brass is applied with an oxy.
Have a look on your dashboard on either side connecting to the pillars.
Back floor around the heater pipes, and so on.
Thanks for the comments
Kuch
The problem i had was brass patching on panels from previous repairs.
Brass is applied with an oxy.
Have a look on your dashboard on either side connecting to the pillars.
Back floor around the heater pipes, and so on.
Thanks for the comments
Kuch
Kuch's Laser Cut Products
http://www.kuch.com.au/laser
http://www.kuch.com.au/laser
-
bay window bandit

- DSKer
- Posts: 749
- Joined: Thu Jun 29, 2006 1:27 pm
- Location: sydney

-
splitbus07
- DSKer
- Posts: 615
- Joined: Thu Nov 08, 2007 11:43 am
- Location: North Balgowlah, Sydney
-
Kuchster
- DSKer
- Posts: 495
- Joined: Sun Dec 02, 2007 10:12 pm
- Location: Sydney West
Haha thanks Mats, now just away with the mazda van and you'll be right!
Will keep you posted, dont try it if you dont know what your doing though!
Kuch
Will keep you posted, dont try it if you dont know what your doing though!
Kuch
Kuch's Laser Cut Products
http://www.kuch.com.au/laser
http://www.kuch.com.au/laser
-
Kuchster
- DSKer
- Posts: 495
- Joined: Sun Dec 02, 2007 10:12 pm
- Location: Sydney West
Just remember, im not the one doin the metal work and welding,
He is a professional panel beater for 20 years!
Im only a helper and learner!
We work together and we are good mates, so we've worked it out and there will be plenty more work in the future to come!
Kuch
He is a professional panel beater for 20 years!
Im only a helper and learner!
We work together and we are good mates, so we've worked it out and there will be plenty more work in the future to come!
Kuch
Kuch's Laser Cut Products
http://www.kuch.com.au/laser
http://www.kuch.com.au/laser
-
bay window bandit
- DSKer
- Posts: 749
- Joined: Thu Jun 29, 2006 1:27 pm
- Location: sydney
-
bay window bandit
- DSKer
- Posts: 749
- Joined: Thu Jun 29, 2006 1:27 pm
- Location: sydney
-
Karmann1

- DSKer
- Posts: 216
- Joined: Tue Aug 07, 2007 9:36 pm
- Location: Mildura
-
Kuchster
- DSKer
- Posts: 495
- Joined: Sun Dec 02, 2007 10:12 pm
- Location: Sydney West
Last saturday not much happening on the kombi, however we did straighten 3 ribbed bumpers.
This saturday, started on the left side. Cargo door sill etc.
Doesnt look too bad from the outside.

Either does this.

Completely full of dirt.

You start cutting, then you cut some more, every time.

Off with the old.

Top hats and outriggers and jack points all to be replaced.

That looks better.

All gotta go unfortuantly, then start again.

Top hat repair sections. We also did all the outriggers today too but i dont have a pic, will tomorrow hopefully.

Tack inner sill in place.

Off with the outer sill. Wheel arch end piece still looks ok so we left it there.

Theres the left overs. There is a lot more mud/dirt than what you think.

Should be finished this side tomorrow.
Enjoy, Kuch
This saturday, started on the left side. Cargo door sill etc.
Doesnt look too bad from the outside.
Either does this.
Completely full of dirt.
You start cutting, then you cut some more, every time.
Off with the old.
Top hats and outriggers and jack points all to be replaced.
That looks better.
All gotta go unfortuantly, then start again.
Top hat repair sections. We also did all the outriggers today too but i dont have a pic, will tomorrow hopefully.
Tack inner sill in place.
Off with the outer sill. Wheel arch end piece still looks ok so we left it there.
Theres the left overs. There is a lot more mud/dirt than what you think.
Should be finished this side tomorrow.
Enjoy, Kuch
Kuch's Laser Cut Products
http://www.kuch.com.au/laser
http://www.kuch.com.au/laser
-
kombi1976
- DSKer
- Posts: 3744
- Joined: Thu Jan 25, 2007 2:59 pm
- Location: Southern Tablelands
-
Kuchster
- DSKer
- Posts: 495
- Joined: Sun Dec 02, 2007 10:12 pm
- Location: Sydney West
Well we did half a day today, then the rain started and the oxy bottle ran out.
Heres the outriggers and top hats that we did yesterday.

Found that the top hat had further rust, so we replaced it with 30cm length instead of 20cm

Replaced floor section that meets with and locks the cargo doors.

Outer sill, having a look and lining it up.

New drippers.

Looks better once its covered up again.

Then it started raining and we started running!
Now have to wait til next weekend.
Kuch
Heres the outriggers and top hats that we did yesterday.
Found that the top hat had further rust, so we replaced it with 30cm length instead of 20cm
Replaced floor section that meets with and locks the cargo doors.
Outer sill, having a look and lining it up.
New drippers.
Looks better once its covered up again.
Then it started raining and we started running!
Now have to wait til next weekend.
Kuch
Kuch's Laser Cut Products
http://www.kuch.com.au/laser
http://www.kuch.com.au/laser