59 Split 11 Window - Resto
Moderators: warb, Rawdyn, Leroy, byronbus, Tonz Magonz, dmb
-
warb

- Mod
- Posts: 7518
- Joined: Mon May 16, 2005 5:15 pm
- Location: Penrith, Nsw, Australia
- Contact:
-
jhp1
- DSKer
- Posts: 714
- Joined: Tue Mar 28, 2006 11:42 am
- Location: Bendigo
- Contact:
-
Dasdubber

- DSKer
- Posts: 1847
- Joined: Thu Dec 01, 2005 10:18 pm
- Location: Gold Coast
Jack's new engine arrived yesterday courtesy of Dave Becker (selling on behalf of his mate) - new 94 x 74 2054cc, Case is a Rimco USA machined and prepared "thick back" (EFI) thin stud case, crank and rods are new old stock EMS, counterweighted and balanced, 14lb 8 dowel flywheel, cam is a Berg 296 same as an Engle #100, Piston and barrells are Cima, heads are twin port with a mild port job, and new valves. Comp is set at 8.0 to 1. (info courtesy of Dave)

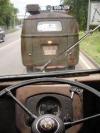
Sneak peak...

A few "before shots" to detail some of the "to-do's"


Outer and inner sills will need replacing....

Cab floors are sweet!

Bulkhead is nice also

Both windscreen lower edges need attention

Outer and inner nose required (maybe a whole skin since there are so many dents (but we'll see if I can beat it out and shrink it back to shape - will evaluate more later)

Passenger dogleg buckled up, sill under cargo doors gone and cargo door lower skins were previously "repaired" with the help of pop rivets!

Both lower rear corners


Both trays gone too

Sneak peak...
A few "before shots" to detail some of the "to-do's"
Outer and inner sills will need replacing....
Cab floors are sweet!
Bulkhead is nice also
Both windscreen lower edges need attention
Outer and inner nose required (maybe a whole skin since there are so many dents (but we'll see if I can beat it out and shrink it back to shape - will evaluate more later)
Passenger dogleg buckled up, sill under cargo doors gone and cargo door lower skins were previously "repaired" with the help of pop rivets!
Both lower rear corners
Both trays gone too
-
warb
- Mod
- Posts: 7518
- Joined: Mon May 16, 2005 5:15 pm
- Location: Penrith, Nsw, Australia
- Contact:
-
byronbus

- Admin
- Posts: 7840
- Joined: Mon May 16, 2005 10:45 pm
- Location: Byron Bay
-
5PL1TDCS10N
- DSKer
- Posts: 430
- Joined: Thu Oct 12, 2006 9:16 pm
- Location: Perth, WA
-
Leroy
- DSKer
- Posts: 2544
- Joined: Thu Jul 05, 2007 11:58 pm
- Location: Brisbane (bayside)
-
Dasdubber
- DSKer
- Posts: 1847
- Joined: Thu Dec 01, 2005 10:18 pm
- Location: Gold Coast
Okay Jack, now Damo's beetle is done I can get cracking on your bus (as mentioned to you I'll divide my time between your split, another bare metal splitty resto (owner who you've already met!), and a third splitty panel (rust repair/mechanicals but no paint).
So the ball is rolling! I've done up the design for the rotisserie (no point sending it off for blasting until that is ready so they can do underneath). IRS will happen before blasting so stay tuned!
Bit more poking today revealed someone's previous "repair" to the drivers side sill which involved hammering the rust in then filling it with bog! Ahhh, the joys of re-repairing
-
Dasdubber
- DSKer
- Posts: 1847
- Joined: Thu Dec 01, 2005 10:18 pm
- Location: Gold Coast
Damo's bug is out of the shop so Jack's bus took pride of place on the hoist!

This is a classic repair - the chassis centre section at both front and rear were obviously rusty, so someone has got donor sections from another split and oxy welded them over the top of the rusty areas. Rear:

Front: (screwdriver is pried in between the 'new' and old centre sections.

5mm flat bar (17cm x 3cm) was used for the upper seat belt mounting plate - a high tensile nut was welded on the back side, then it was positioned in the b-pillar ready for welding tomorrow (mig welder ran out of wire and gas this arvo). Bottom plates were also made (5mm flat bar, 10cm x 5cm).

Tomorrow the front end will be stripped, and most likely the back end in readiness for the ratmuller IRS conversion.
Al
This is a classic repair - the chassis centre section at both front and rear were obviously rusty, so someone has got donor sections from another split and oxy welded them over the top of the rusty areas. Rear:
Front: (screwdriver is pried in between the 'new' and old centre sections.
5mm flat bar (17cm x 3cm) was used for the upper seat belt mounting plate - a high tensile nut was welded on the back side, then it was positioned in the b-pillar ready for welding tomorrow (mig welder ran out of wire and gas this arvo). Bottom plates were also made (5mm flat bar, 10cm x 5cm).
Tomorrow the front end will be stripped, and most likely the back end in readiness for the ratmuller IRS conversion.
Al
-
kombi1976

- DSKer
- Posts: 3744
- Joined: Thu Jan 25, 2007 2:59 pm
- Location: Southern Tablelands
-
Hoves
- DSKer
- Posts: 1085
- Joined: Mon Oct 30, 2006 4:46 pm
- Location: Queensland
-
Dasdubber
- DSKer
- Posts: 1847
- Joined: Thu Dec 01, 2005 10:18 pm
- Location: Gold Coast


-
byronbus
- Admin
- Posts: 7840
- Joined: Mon May 16, 2005 10:45 pm
- Location: Byron Bay
-
Dasdubber
- DSKer
- Posts: 1847
- Joined: Thu Dec 01, 2005 10:18 pm
- Location: Gold Coast
Holes were ground with a slight taper for neatness even though the seatbelts will cover them.

High tensile M10 nut welded to the lower mount plate.

As per required specs, plate is 10cm x 5cm (5mm thick).

The plate was welded to the underside of the wheel well via a couple of plug welds through the top (ground down in this pic).

My old mig finally started to die today so I had to shell out a sparkly new WIA unit....it will get a good work out on Jack's rusty old bus
Al
High tensile M10 nut welded to the lower mount plate.
As per required specs, plate is 10cm x 5cm (5mm thick).
The plate was welded to the underside of the wheel well via a couple of plug welds through the top (ground down in this pic).
My old mig finally started to die today so I had to shell out a sparkly new WIA unit....it will get a good work out on Jack's rusty old bus
Al