59 Split 11 Window - Resto

Post pics and info of your rides here split windows only

Moderators: warb, Rawdyn, Leroy, byronbus, Tonz Magonz, dmb

Post Reply
User avatar
chillax
DSKer
Posts: 172
Joined: Sun Feb 24, 2008 1:56 pm
Location: Brisbane

Post by chillax »

The body left to the blasters a week or so ago and came back yesterday!
Image

Some parts from the blasters came up nicely, some not so nicely. The items were sprayed with single pack etch primer (black), which is compatible with two pack etch over the top where necessary.
Image


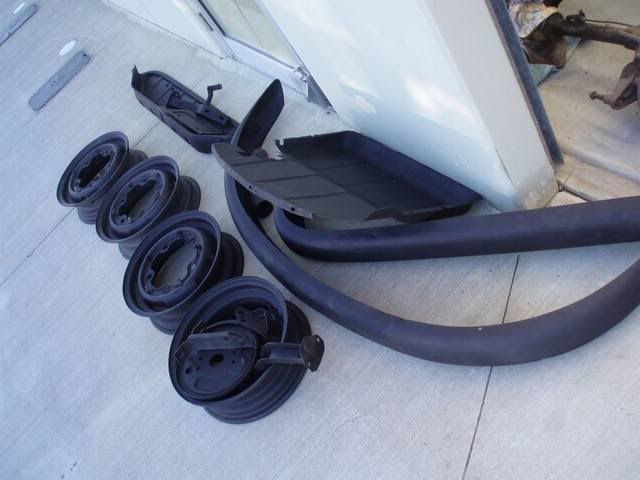
Window frames aren’t too pretty. Still talking to Al about either repair or replace.
Image


The black areas have been blasted and etch primed, grey areas were stripped by me previously and just need a buzz back to expose bare metal again.
Image

Some damage to be repaired on the popout hinge sections.
Image

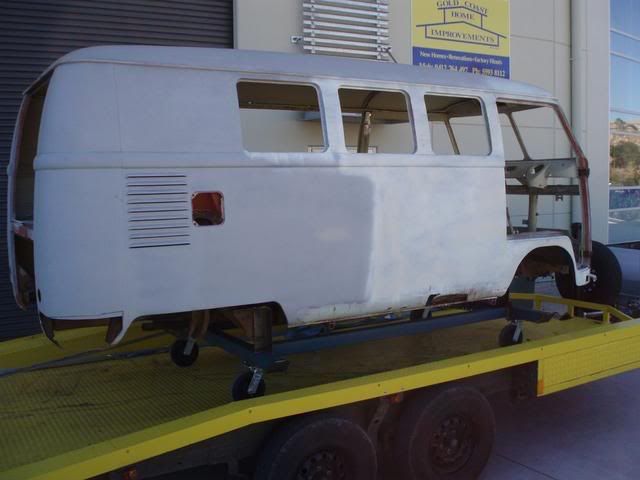
The cargo floor is nice and straight overall, but there is a number of rusty sections to repair.
Image

Cab floor is really good, only a few minor holes to repair.
Image

Had planned to replace only the outer left dogleg however the inner may need replacing as well (Al will investigate more soon)
Image

Left side rear sill (outer and inner) will be replaced.
Image

Right inner arch will also be re-repaired.
Image

A decision was made to replace the entire lower windscreen section.
Image

The outer section was therefore cut out to expose a relatively solid inner (just a few little sections for Al to fix).
Image

The previous repair involved brazing the rusty metal to the hinge which all had to be cut and ground off.
Image


Here the section is almost out and the next repair section marked out...only a little hole from the outside...
Image

However when viewed from the inside you can see why a big section has to be repaired.
Image


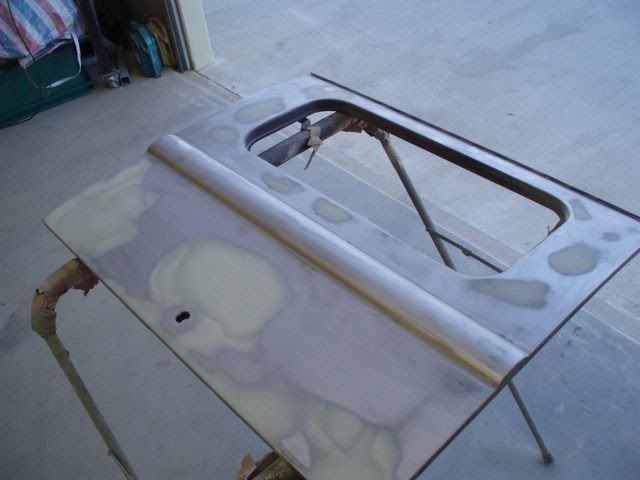
While body was at the blasters, Al started on the rear hatch - inside was good only one dent to fix.

Image


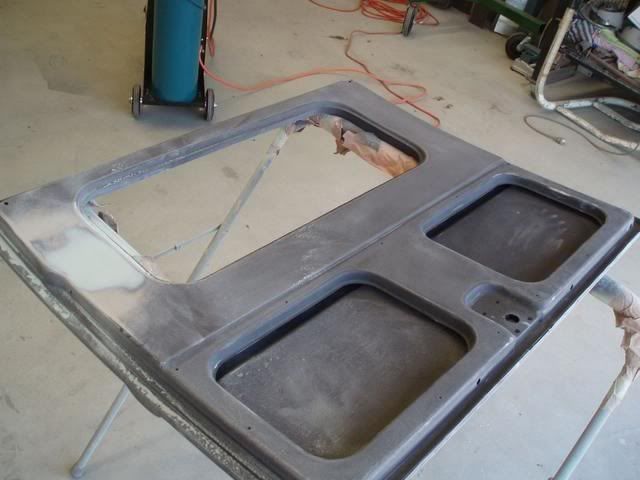
Although no rust present, quite a few dents needed attention before filler went on. Will get etched and high build primed today most likely.

Image


There are a heap more pics on here if anyone is keen :D:
http://www.manxgallery.org/gallery/album568?page=2


Jack
Hoves
DSKer
Posts: 1085
Joined: Mon Oct 30, 2006 4:46 pm
Location: Queensland

Post by Hoves »

Good stuff Jack. Looks like it is coming along well.
User avatar
Shaven
DSKer
Posts: 7420
Joined: Tue Sep 19, 2006 4:17 pm

Post by Shaven »

hey jack... they are great pics... close up, nice & clear... keep the ggod work up champ :wink:
Only those whom drive a Dual Cab, Know what real driving is all about
User avatar
Leroy
DSKer
Posts: 2544
Joined: Thu Jul 05, 2007 11:58 pm
Location: Brisbane (bayside)

Post by Leroy »

Hey Jack, great to see some progress pics on this one. I was down at Al's the other day, but unfortunately for me only the tail gate was there. :lol: Keep up the posts mate!

Cheers, Leroy
User avatar
chillax
DSKer
Posts: 172
Joined: Sun Feb 24, 2008 1:56 pm
Location: Brisbane

Post by chillax »

Thanks for the comments guys! But I have the easy job of just updating the forums :D . Al is doing all the hardwork.
Here is what the man has been up to at the end of last week.

A roof rack may have been on the bus at some stage which caused buckles in the gutter.
Image

After a bit of massaging they are back in shape (some final straightening to come before primer)
Image

After cutting away the lower windscreen rusty sections, more of the left a-pillar rust was exposed
Image

A number or repair sections were required in this area but its all solid once again. All butt welded and ground smooth despite the fact no-one will see it again!
Image

The left door rust repair sections were butt welded in and dressed smooth. Quite a few dents to pull out of the doors so a skim coat of filler will smooth this area out nicely after panel beating. No warping was a good result
Image

Almost all of the hinge plates were rusted beyond repair so new ones were fabbed out of 5mm steel, cut to shape and drilled/tapped for the M8x1.25 thread
Image

The inside was painted first with rust kill paint then it was sealed up (either flap welded shut, or new steel welded in) and ground smooth
Image

More rust - this time in upper left windscreen surround
Image

Will sort out final rust issues then shoot some paint under dash, front of heater tube etc before nose goes on.
Image

A decision was made to remove the entire outer windscreen section rather than just the lower due to the rust in the upper a-pillar
Image

The spot welds were ground down using a tungsten carbide cutting bit in the die grinder then the outer skin was cut back and twisted off with piliers to pop the spot welds
Image

Once removed it was easier to see what we had to deal with
Image

Here it is with the entire outer windscreen removed
Image

Due to some rust in the inner windscreen section it was decided to remove the upper inner sections as well
Image

Image

Upper a-pillar rust was repaired, a little more to go before inner and outer skins can go back on.
Image


Jack
User avatar
byronbus
Admin
Posts: 7840
Joined: Mon May 16, 2005 10:45 pm
Location: Byron Bay

Post by byronbus »

This great guys, haven't seen many better at this than al, done right, done once.

And thanks also for the pics, love watching the skills and progress
User avatar
Dasdubber
DSKer
Posts: 1847
Joined: Thu Dec 01, 2005 10:18 pm
Location: Gold Coast

Post by Dasdubber »

No probs Bruce, I thought I'd let Jack post up what pics he wants - I upload all my pics to the manxgallery site regardless and let the owners decide what they want to show :)

Cheers
Al

PS I'm enjoying this resto immensely as its nice to do a job that I don't have to cut corners with....buy once cry once so they say.
User avatar
brad@busnbug
DSKer
Posts: 1762
Joined: Tue May 17, 2005 6:45 pm
Location: Melburg
Contact:

Post by brad@busnbug »

Great to read and watch. This is edukation! Brilliant work as usual Al.
User avatar
Volksaddict
DSKer
Posts: 622
Joined: Mon Jun 27, 2005 3:27 pm
Location: Sawtell mid northcoast NSW

Post by Volksaddict »

...yeah great read ..inspirational!!!
Cheers and Beers rayv
User avatar
joshroom
DSKer
Posts: 487
Joined: Sat Jul 21, 2007 11:08 pm
Location: perth

Post by joshroom »

thanks for all the pics men, havnt seen a bus so naked before. cool to see how its all put together under windscreen sections!
( buy once, cry once) not a bad moto!
____________
User avatar
Dasdubber
DSKer
Posts: 1847
Joined: Thu Dec 01, 2005 10:18 pm
Location: Gold Coast

Post by Dasdubber »

I'm sure Jack will upload pics at some stage, but thought I'd post up one pic of a bit of a milsestone today - the bus had its first flip upside down...happy days!
Image
Hoves
DSKer
Posts: 1085
Joined: Mon Oct 30, 2006 4:46 pm
Location: Queensland

Post by Hoves »

Saw this yesterday when at Als place. Certainly in safe hands (and kept close company by the ute).
User avatar
OMR_007
DSKer
Posts: 657
Joined: Mon Feb 25, 2008 10:45 pm
Location: Brisbane

Post by OMR_007 »

that's so inspirational Al .... great to see someone taking so much pride in their work!
Look at the floor, you could let a child play around on that, so clean and tidy 8)
4171 REP
User avatar
chillax
DSKer
Posts: 172
Joined: Sun Feb 24, 2008 1:56 pm
Location: Brisbane

Post by chillax »

The bus is now upside down 8)

Someone in its former life decided semaphores weren't cool and plugged them up
Image

A bit of time with the cut off wheel, die grinder and angle sander opened it back up
Image

Just a little welding will be required to fill the gaps where the previous welds had to be ground off
Image

Rust in the upper left side of the windscreen (inner)
Image

Rust was cut out, and a patch welded in and ground smooth
Image

The rotisserie extensions were finished and he bus had its first flip today.
Image

A bit of adjustment will be required to get the centre of gravity right so it spins a little easier.
Image

Rear mounting bracket...
Image

After the lower A-pillar was cut out, the dogleg doesn't look all that flash
Image

The rust in the lower left inner windscreen was repaired
Image

Same spot but different view
Image

Right side also repaired
Image

Viewed from the inside
Image

More rust in the A-pillar - will be cut out tomorrow
Image

Above the left door there were also some rust areas (bus is upside down on rotisserie)
Image

Problem areas cut out
Image

Top of left door frame (inside) had a few holes which suggested there was rust hiding inside
Image

Suspicions were confirmed as it was pretty crusty!
Image

Next resto is on the hoist being stripped at the moment! (Hoves ute!)
Image


Jack
User avatar
coupons
DSKer
Posts: 322
Joined: Fri Nov 23, 2007 7:23 pm
Location: north west Sydney

Post by coupons »

bet you're enjoying it right now

lookin good

8)
Post Reply