Hoves 64 SC
Moderators: warb, Rawdyn, Leroy, byronbus, Tonz Magonz, dmb
-
frenzix
- DSKer
- Posts: 4516
- Joined: Mon May 16, 2005 12:56 am
- Contact:
-
Shaven

- DSKer
- Posts: 7420
- Joined: Tue Sep 19, 2006 4:17 pm
-
Hoves
- DSKer
- Posts: 1085
- Joined: Mon Oct 30, 2006 4:46 pm
- Location: Queensland
-
Hoves
- DSKer
- Posts: 1085
- Joined: Mon Oct 30, 2006 4:46 pm
- Location: Queensland
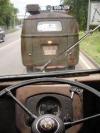
Finally some updates. I am a real slack ass when it comes to updating this but here are a few shots. Al and Steve are doing a great job and its really taking shape now.
- Attachments
-
- After filling a heap of dents on the loading bed, the whole lot was shot with epoxy then high build primer
- Dec1_primed1.JPG (43.44 KiB) Viewed 2548 times
-
- After filler work was done on the roof, it was primed as well (now ready for guide coat and more sanding)
- Dec1_primed2.JPG (37.99 KiB) Viewed 2548 times
-
- Hung and adjusted the left cab door today - had to pull out some dents/crease before filler work began
- Dec3_cab_door_crease.JPG (53.91 KiB) Viewed 2548 times
-
- Epoxy and then high build primer was applied to the door
- Dec3_cab_door_primed.JPG (30.25 KiB) Viewed 2548 times
-
- Likewise for the inner door frame etc
- Dec3_cab_door_inner_primed.JPG (44.84 KiB) Viewed 2548 times
-
- More dent pulling on drivers cab door
- Dec5_cab_door_dent_pulling.JPG (45.86 KiB) Viewed 2548 times
-
- After waiting months for a new rear arch and then being sent the wrong ones I decided to repair the exising banged up arch to avoid further delays
- Dec8_damaged_rear_sill1.JPG (51.04 KiB) Viewed 2548 times
-
- A Gerson lower sill repair section will be installed as the existing was not in great shape inside
- Dec8_rusty_rear_sill.JPG (61.39 KiB) Viewed 2548 times
-
- After cutting it out the rest of the panel will be beaten back to shape to avoid overuse of filler as per previous 'repair'
- Dec8_damaged_sill_removed.JPG (54.01 KiB) Viewed 2548 times
-
- Spent quite a while repairing the damage to the arch lip - still a little more work to do especially on the upper panel
- Dec8_repaired_wheel_lip.JPG (52.76 KiB) Viewed 2548 times
-
Hoves
- DSKer
- Posts: 1085
- Joined: Mon Oct 30, 2006 4:46 pm
- Location: Queensland
And more
- Attachments
-
- Wolfsburg West loading bed sections were trial fitted today and cleco'd in place
- Dec16_loading_bed_trial_fit1.JPG (58.66 KiB) Viewed 2545 times
-
- Cut and bend lines were marked before the bed sections were removed
- Dec16_loading_bed_trial_fit2.JPG (65.58 KiB) Viewed 2545 times
-
- Dec17_safaris_closed.JPG (51.13 KiB) Viewed 2545 times
-
- Dec17_safaris_inside.JPG (58.83 KiB) Viewed 2545 times
-
- Dec17_safaris_open.JPG (49.21 KiB) Viewed 2545 times
-
- Stainless cap head bolts will keep them in place
- Nov24_tie_down4.JPG (51.37 KiB) Viewed 2545 times
-
- Nov26 front tie down1
- Nov26_front_tie_down1.JPG (48.97 KiB) Viewed 2545 times
-
Leroy
- DSKer
- Posts: 2544
- Joined: Thu Jul 05, 2007 11:58 pm
- Location: Brisbane (bayside)
-
morts
- DSKer
- Posts: 2097
- Joined: Sun Oct 29, 2006 9:22 pm
- Location: McLaren Vale, South Australia
-
Brewmaster
- DSKer
- Posts: 514
- Joined: Sat Mar 01, 2008 12:36 pm
- Location: Sunshine Coast, Qld
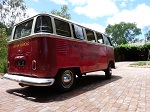
Great resto .....
Great resto ......
I have been watching this on Al's web site (gallery) and have found this an amazing resto for a bus that looked so good when it went in.
Al is doing a fantastic job on your SC and it will be like a showroom floor bus when finished.
Can't wait to see the finished job.
I have been watching this on Al's web site (gallery) and have found this an amazing resto for a bus that looked so good when it went in.
Al is doing a fantastic job on your SC and it will be like a showroom floor bus when finished.
Can't wait to see the finished job.
-
Shaven
- DSKer
- Posts: 7420
- Joined: Tue Sep 19, 2006 4:17 pm
-
Dasdubber

- DSKer
- Posts: 1847
- Joined: Thu Dec 01, 2005 10:18 pm
- Location: Gold Coast
http://dasrestohaus.com.au/gallery2/main.php
...in current restorations section.
Proper website will be coming soon but I update the pics daily for whatever we are working on.
Al
...in current restorations section.
Proper website will be coming soon but I update the pics daily for whatever we are working on.
Al
-
Brewmaster
- DSKer
- Posts: 514
- Joined: Sat Mar 01, 2008 12:36 pm
- Location: Sunshine Coast, Qld
-
splitbus

- DSKer
- Posts: 3232
- Joined: Sun Dec 09, 2007 7:47 am
- Location: Brisbane Northside
-
Hoves
- DSKer
- Posts: 1085
- Joined: Mon Oct 30, 2006 4:46 pm
- Location: Queensland
-
Dasdubber
- DSKer
- Posts: 1847
- Joined: Thu Dec 01, 2005 10:18 pm
- Location: Gold Coast

