'62 Panel....the bush busser - further progress
Moderators: warb, Rawdyn, Leroy, byronbus, Tonz Magonz, dmb
- kombi1976
- DSKer
- Posts: 3744
- Joined: Thu Jan 25, 2007 2:59 pm
- Location: Southern Tablelands
- martinigreenbus
- DSKer
- Posts: 749
- Joined: Fri Dec 18, 2009 9:04 pm
- Location: Das Wasserende von Springvale Straße
- kombi1976
- DSKer
- Posts: 3744
- Joined: Thu Jan 25, 2007 2:59 pm
- Location: Southern Tablelands
Ahhh, well there is that.
But then most of you know the old truce I had with tools......if I didn't touch them they wouldn't break anything or hurt me.
Now that hostilities are open again it's just a matter of time before the tools take a pre-emptive strike.
But then most of you know the old truce I had with tools......if I didn't touch them they wouldn't break anything or hurt me.
Now that hostilities are open again it's just a matter of time before the tools take a pre-emptive strike.
Cheers & God Bless
'62 Beetle
'62 Panel project
'67 Panel
'62 Beetle
'62 Panel project
'67 Panel
- undercircuit
- DSKer
- Posts: 54
- Joined: Wed Feb 27, 2008 9:08 pm
- D-Train
- DSKer
- Posts: 3510
- Joined: Mon Nov 28, 2005 3:03 pm
- Location: coffs harbour
- FrankenCab
- DSKer
- Posts: 3528
- Joined: Wed Apr 18, 2007 8:55 pm
- byronmcmanus59
- DSKer
- Posts: 72
- Joined: Tue Aug 19, 2008 11:44 pm
- Location: Portland
Haha your onto it brent.. those sparks are going the wrong way or your standing on the wrong sidemartinigreenbus wrote:Your using the grinder upside down, if it kicks, it's coming for your temple, I guess thats what BMc59 meant.kombi1976 wrote:Why?byronmcmanus59 wrote:That looks scary andy,
Cause I got medieval on its ass?!
- kombi1976
- DSKer
- Posts: 3744
- Joined: Thu Jan 25, 2007 2:59 pm
- Location: Southern Tablelands
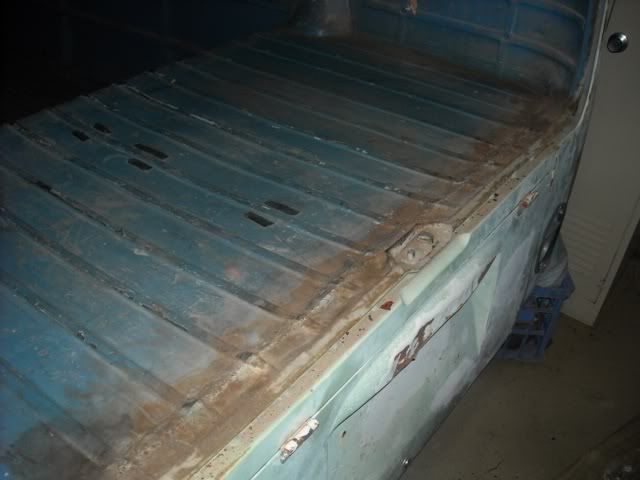
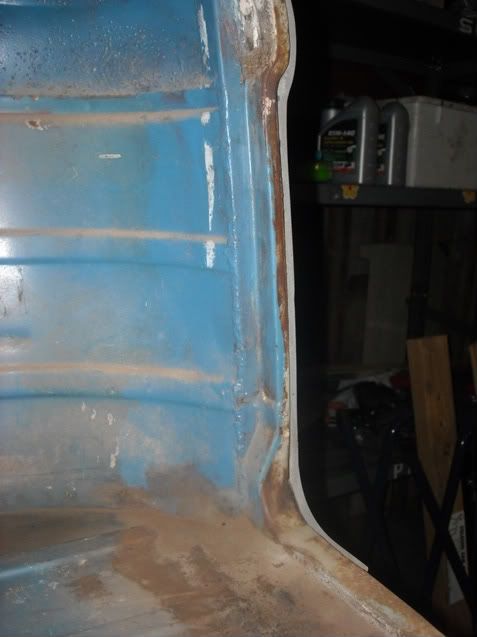
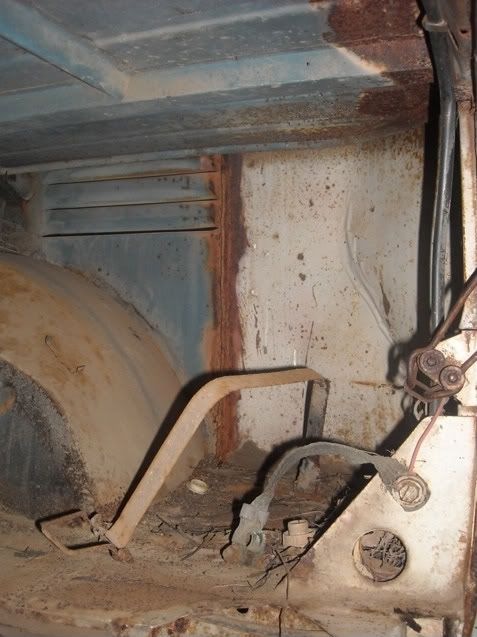
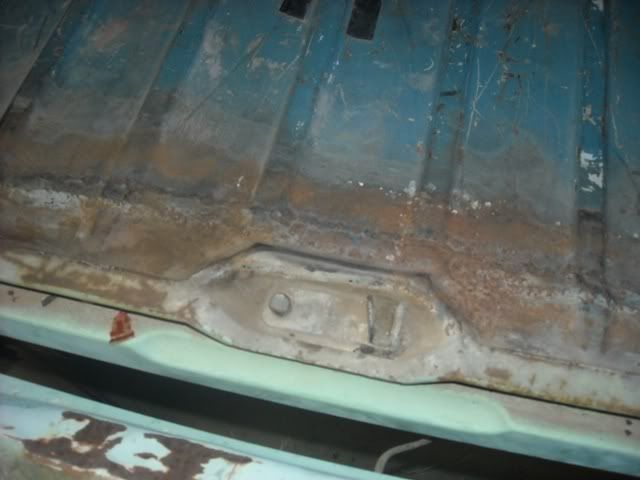
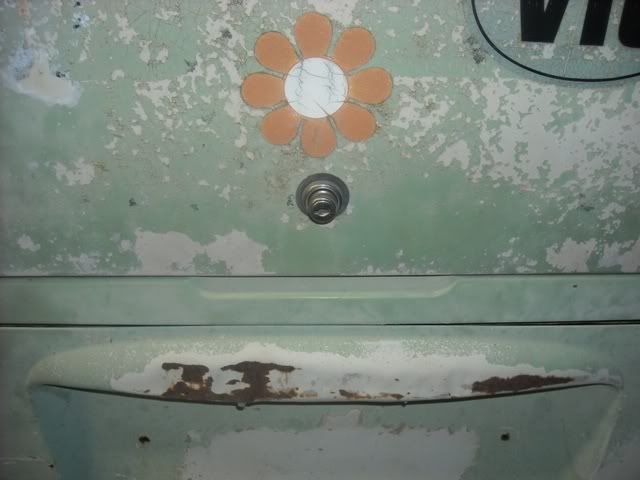
Kinda.....here are the promised pics.Penguin wrote:Can you tell where the back was grafted on?
The weld across the engine shelf:
Here is where the weld joins the rear pillar/corner.
It then is welded up the seam where the corner is normally fitted:
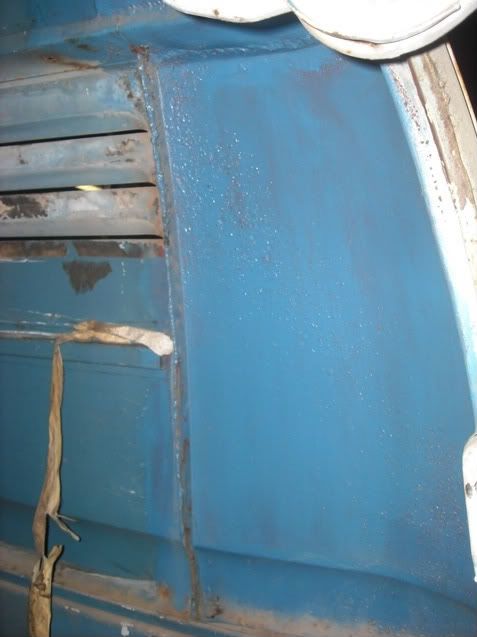
Here's the same seam on the passenger side:
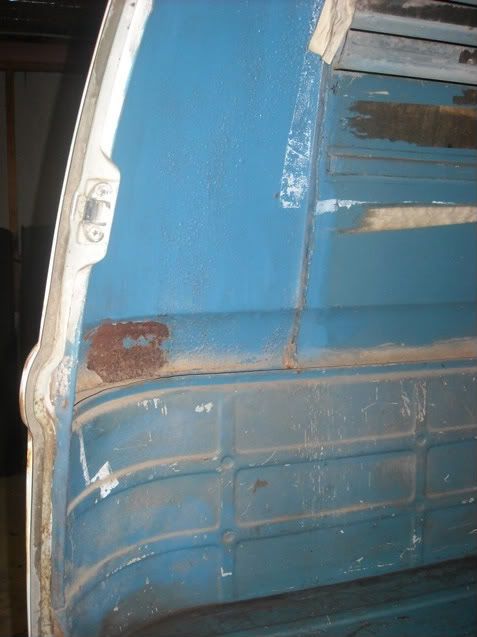
The welds are also in alongside the a battery tray, here on the passenger side:
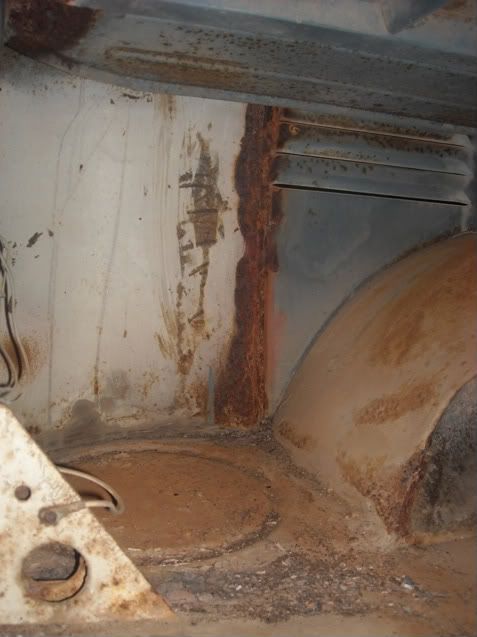
And on the driver's side....even still has the battery bracket!
Here's a closer look at the weld near the door catch....
And with it shut:
Cheers & God Bless
'62 Beetle
'62 Panel project
'67 Panel
'62 Beetle
'62 Panel project
'67 Panel
- kombi1976
- DSKer
- Posts: 3744
- Joined: Thu Jan 25, 2007 2:59 pm
- Location: Southern Tablelands
Yesterday, after asking a few questions in another thread I finally had a proper attempt at removing the rear drums to replace the wheels cylinders. I've said it before and I'll say it again.....I'd dumb and newbie so every bit of mechanical progress by me is a considerable achievement.
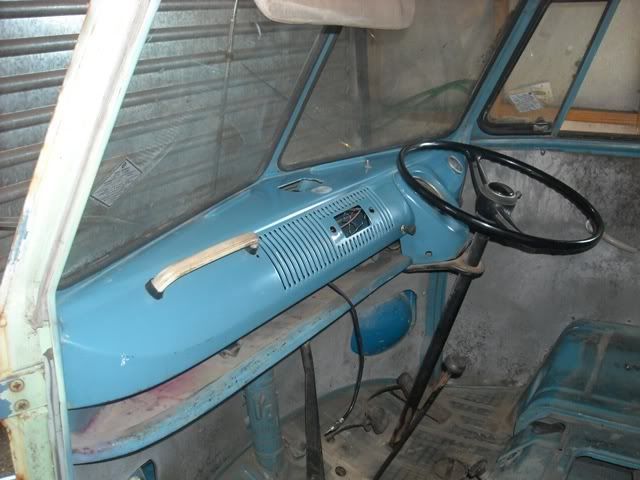
A couple of days back I started by getting some Kitten car polish for older cars and taking a crack at the dash which is in decent condition.
It came up a treat:
After finding out that neither of the back axles had a reverse thread on the nut and grabbed my breaker bar, 36mm socket and 2m length of pipe to get them moving.
It worked a charm after I chocked the front wheels.
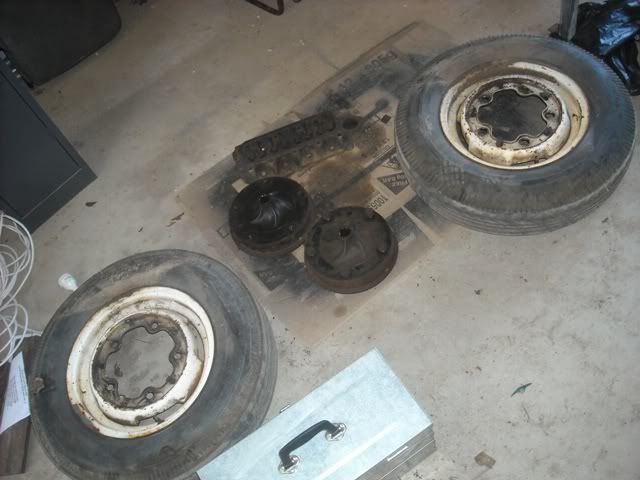
Then I took to the drums with a good rubber mallet and they came off with relative ease.......no puller needed!
The removed drums and wheels:
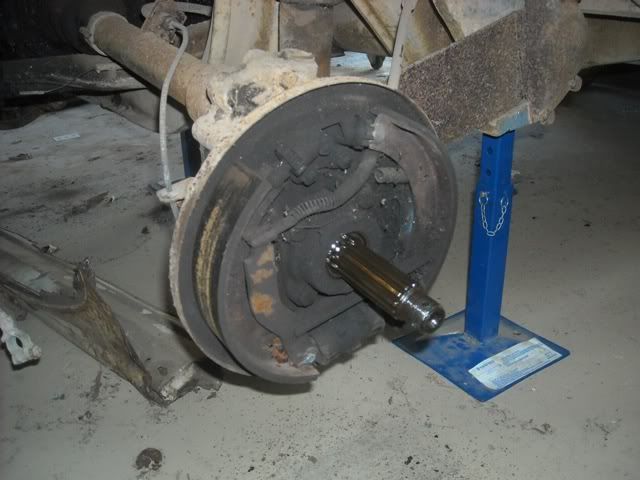
The bare rhs brake assembly:
And the bare lhs brake assembly:
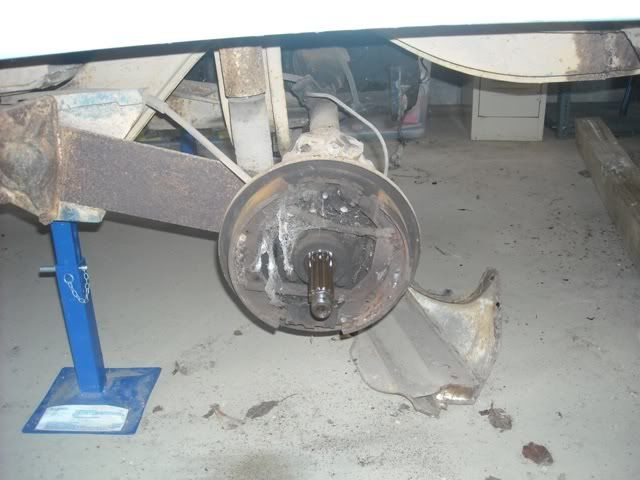
Today I pulled apart the lhs and put a new cylinder on after cleaning it up a bit.
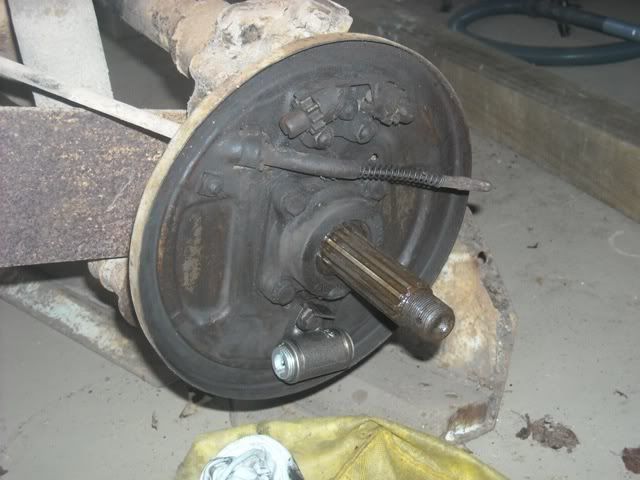
I was going to assemble it again but getting those springs back on is the real bitch.
Any tips?
A couple of days back I started by getting some Kitten car polish for older cars and taking a crack at the dash which is in decent condition.
It came up a treat:

After finding out that neither of the back axles had a reverse thread on the nut and grabbed my breaker bar, 36mm socket and 2m length of pipe to get them moving.
It worked a charm after I chocked the front wheels.
Then I took to the drums with a good rubber mallet and they came off with relative ease.......no puller needed!
The removed drums and wheels:

The bare rhs brake assembly:

And the bare lhs brake assembly:

Today I pulled apart the lhs and put a new cylinder on after cleaning it up a bit.

I was going to assemble it again but getting those springs back on is the real bitch.
Any tips?
Cheers & God Bless
'62 Beetle
'62 Panel project
'67 Panel
'62 Beetle
'62 Panel project
'67 Panel
- splitbus
- DSKer
- Posts: 3233
- Joined: Sun Dec 09, 2007 7:47 am
- Location: Brisbane Northside
- matara
- Admin
- Posts: 1472
- Joined: Wed May 18, 2005 11:34 pm
- Location: Wahroonga, Sydney
- Contact:
Andy,
Whilst its all apart are you going to change the axle seals and check the bearings? Last thing you need is gearbox oil contaminating your freshly new or relined brakes since when you get oil on them they are useless and need to be replaced or relined.
I would be tourquing up all the reduction bolts too, and making sure those adjusters are pulled out and wire brushed and greased with anti-sieze. Adjusting with frozen adjusters is no fun.
Cheers
Steve
- warb
- Mod
- Posts: 7518
- Joined: Mon May 16, 2005 5:15 pm
- Location: Penrith, Nsw, Australia
- Contact:
- scotty*85vw
- DSKer
- Posts: 1279
- Joined: Thu Sep 09, 2010 9:34 pm
id second that mate, while its half apart for the sake of 20 in parts for hours of time later, and even more in the long run if you have to do the pads again.
and iv always found the easyest way is to put all the pads and springs together on the floor....then put them up and put the cylender end in first (even if you have the drums machined and dont go for oversized pads still wind the stars both down all the way and adjust when together) then use a strong arm to push one side in at a time
and iv always found the easyest way is to put all the pads and springs together on the floor....then put them up and put the cylender end in first (even if you have the drums machined and dont go for oversized pads still wind the stars both down all the way and adjust when together) then use a strong arm to push one side in at a time
- kombi1976
- DSKer
- Posts: 3744
- Joined: Thu Jan 25, 2007 2:59 pm
- Location: Southern Tablelands
